Overview
The Slack Notify action allows your AI Agent to send automated messages directly to your Slack workspace. This is especially useful for notifications, alerts, and updates that need to be shared with your team in real time. Example: Send a notification to a Slack channel whenever a new lead is collected or a customer requests support.How to Create a Notify
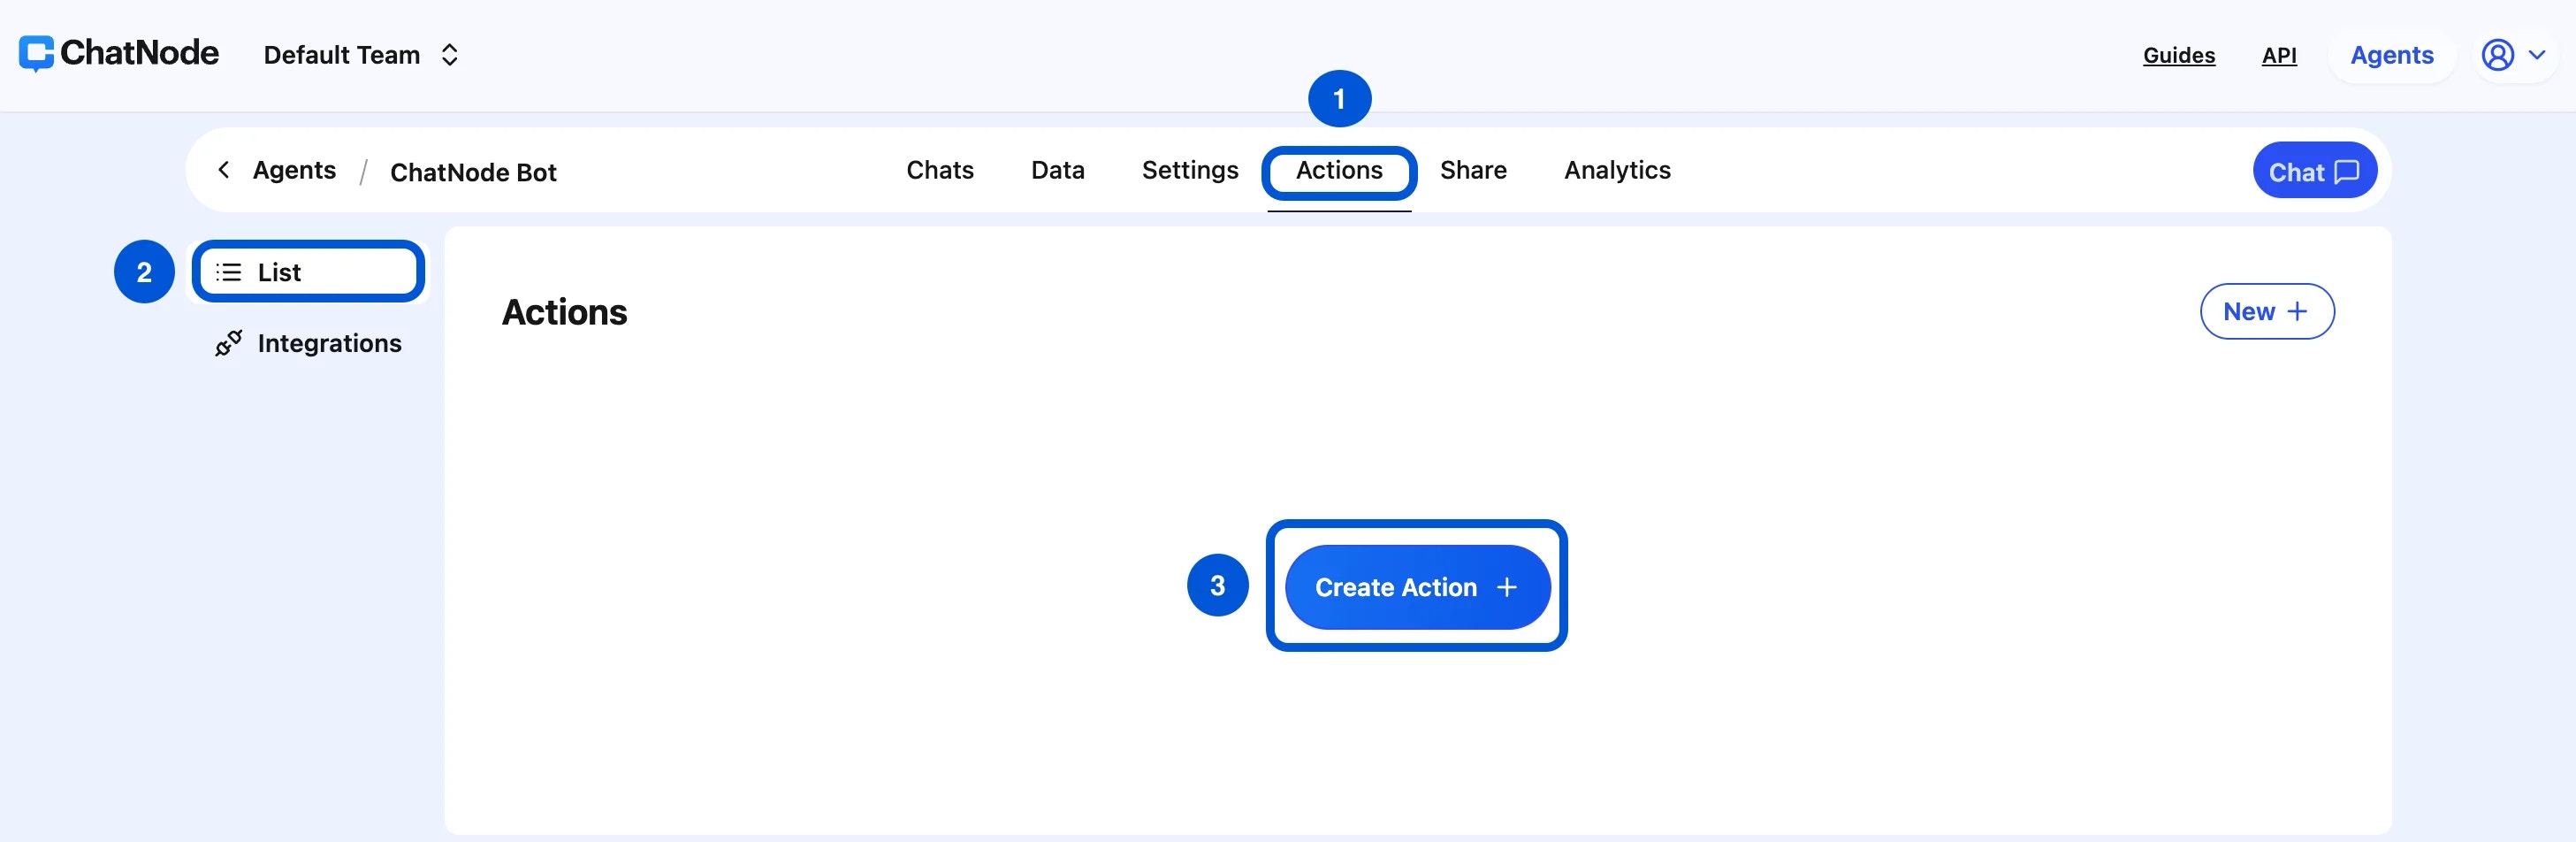
Step 1: Create a Slack Notify Action
- Go to the Actions tab.
- Click List from the left-hand menu.
- Select Create Action.
- Under Slack, choose Notify.
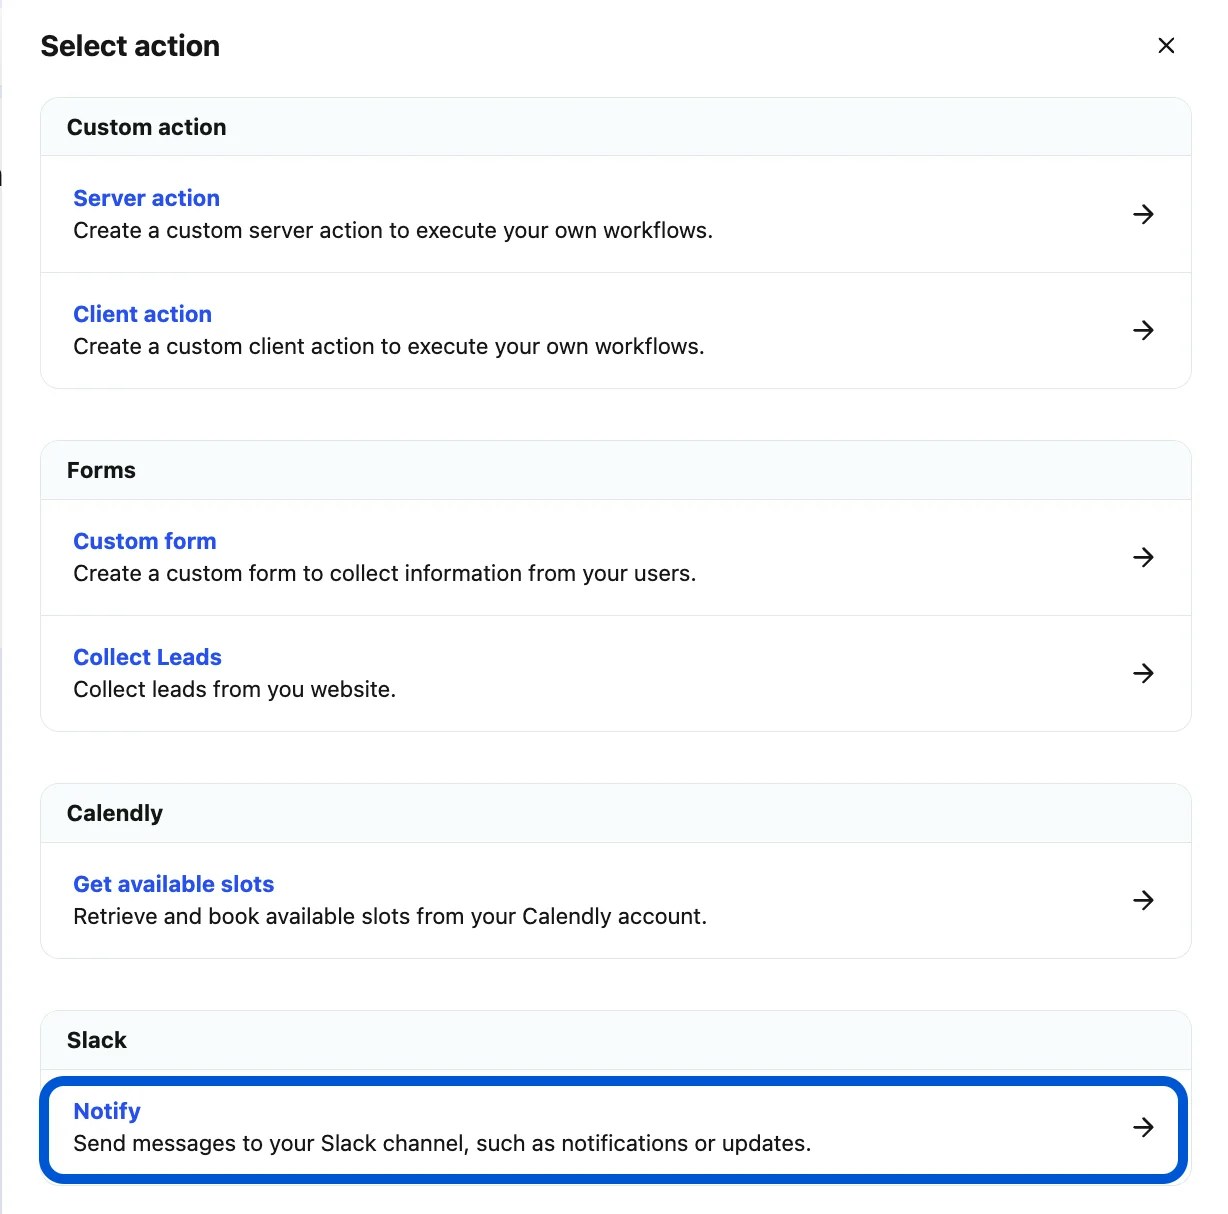
- Enter an Action Title in the pop-up window (e.g., Slack notify) and click Create.
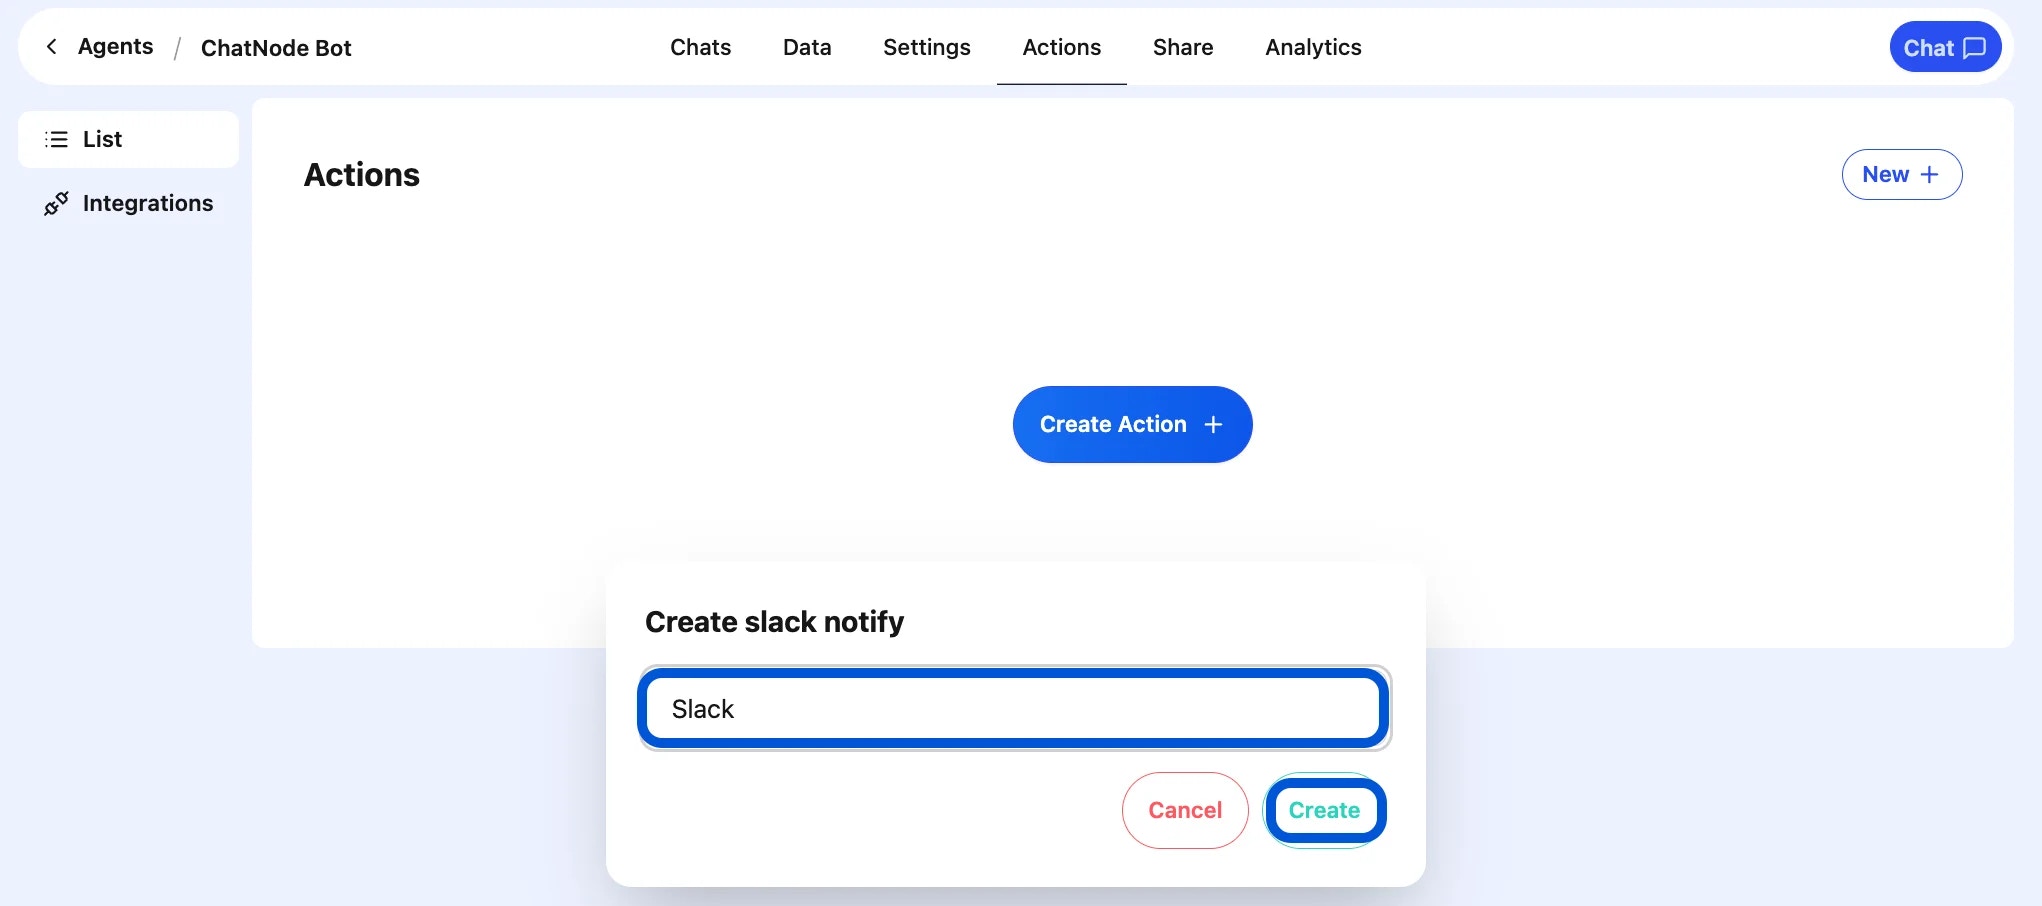
- You’ll now see the configuration screen for Slack notifications.
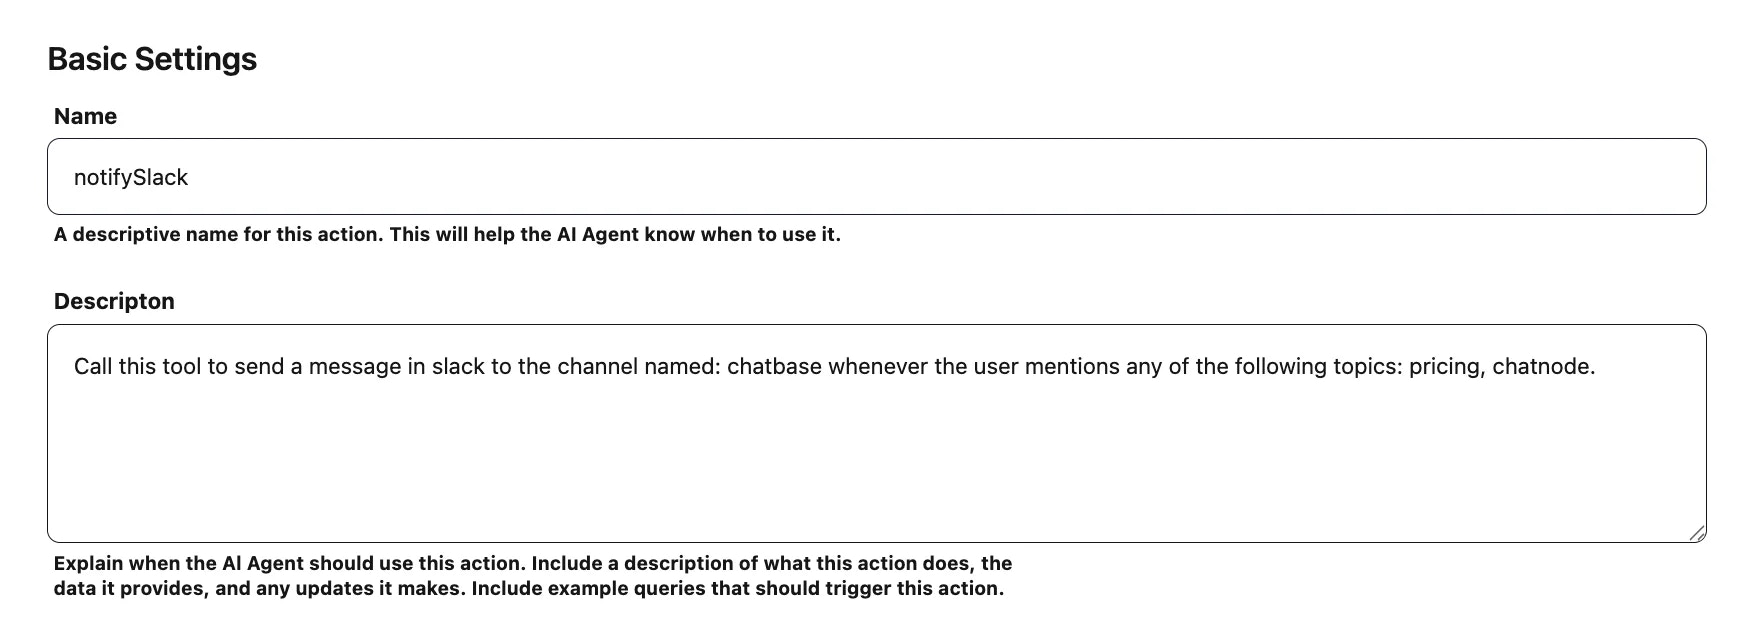
Step 2: Basic Settings
-
Name → Enter a descriptive name.
- Example: newLeadSlack
-
Description → Provide details about when the AI Agent should use this action.
- Example: Send a message to the sales Slack channel when a new lead is collected.
Step 3: Configure the Notification
Once Slack is connected, you can configure the notification content and define:- Which Slack channel the message will go to.
- What message content should be sent (e.g., text updates, lead details, support ticket alerts).
Step 4: Enable the Action
At the top of the configuration screen, toggle from Disable → Enable to activate Slack notifications.
Example Workflow
- A visitor submits a lead form.
- AI Agent collects the information.
- Slack Notify action is triggered.
- A message is sent to the #sales channel: “New Lead Captured — Name: John Doe, Email: john@example.com.”