Overview
A Custom Client Action allows your AI Agent to execute workflows directly in the client (e.g., browser). This is particularly useful for client-side data handling or UI updates. Note: Custom client actions will not work in Slack or the in-app chat window. Example Use Case: Detect the user’s current location and show nearby restaurants, or auto-fill a form with profile data stored in the browser.How to Create a Custom Client Action
Step 1: Create a Custom Client Action
- Go to the Actions tab.
- Click List from the left-hand menu.
- Select Create Action.
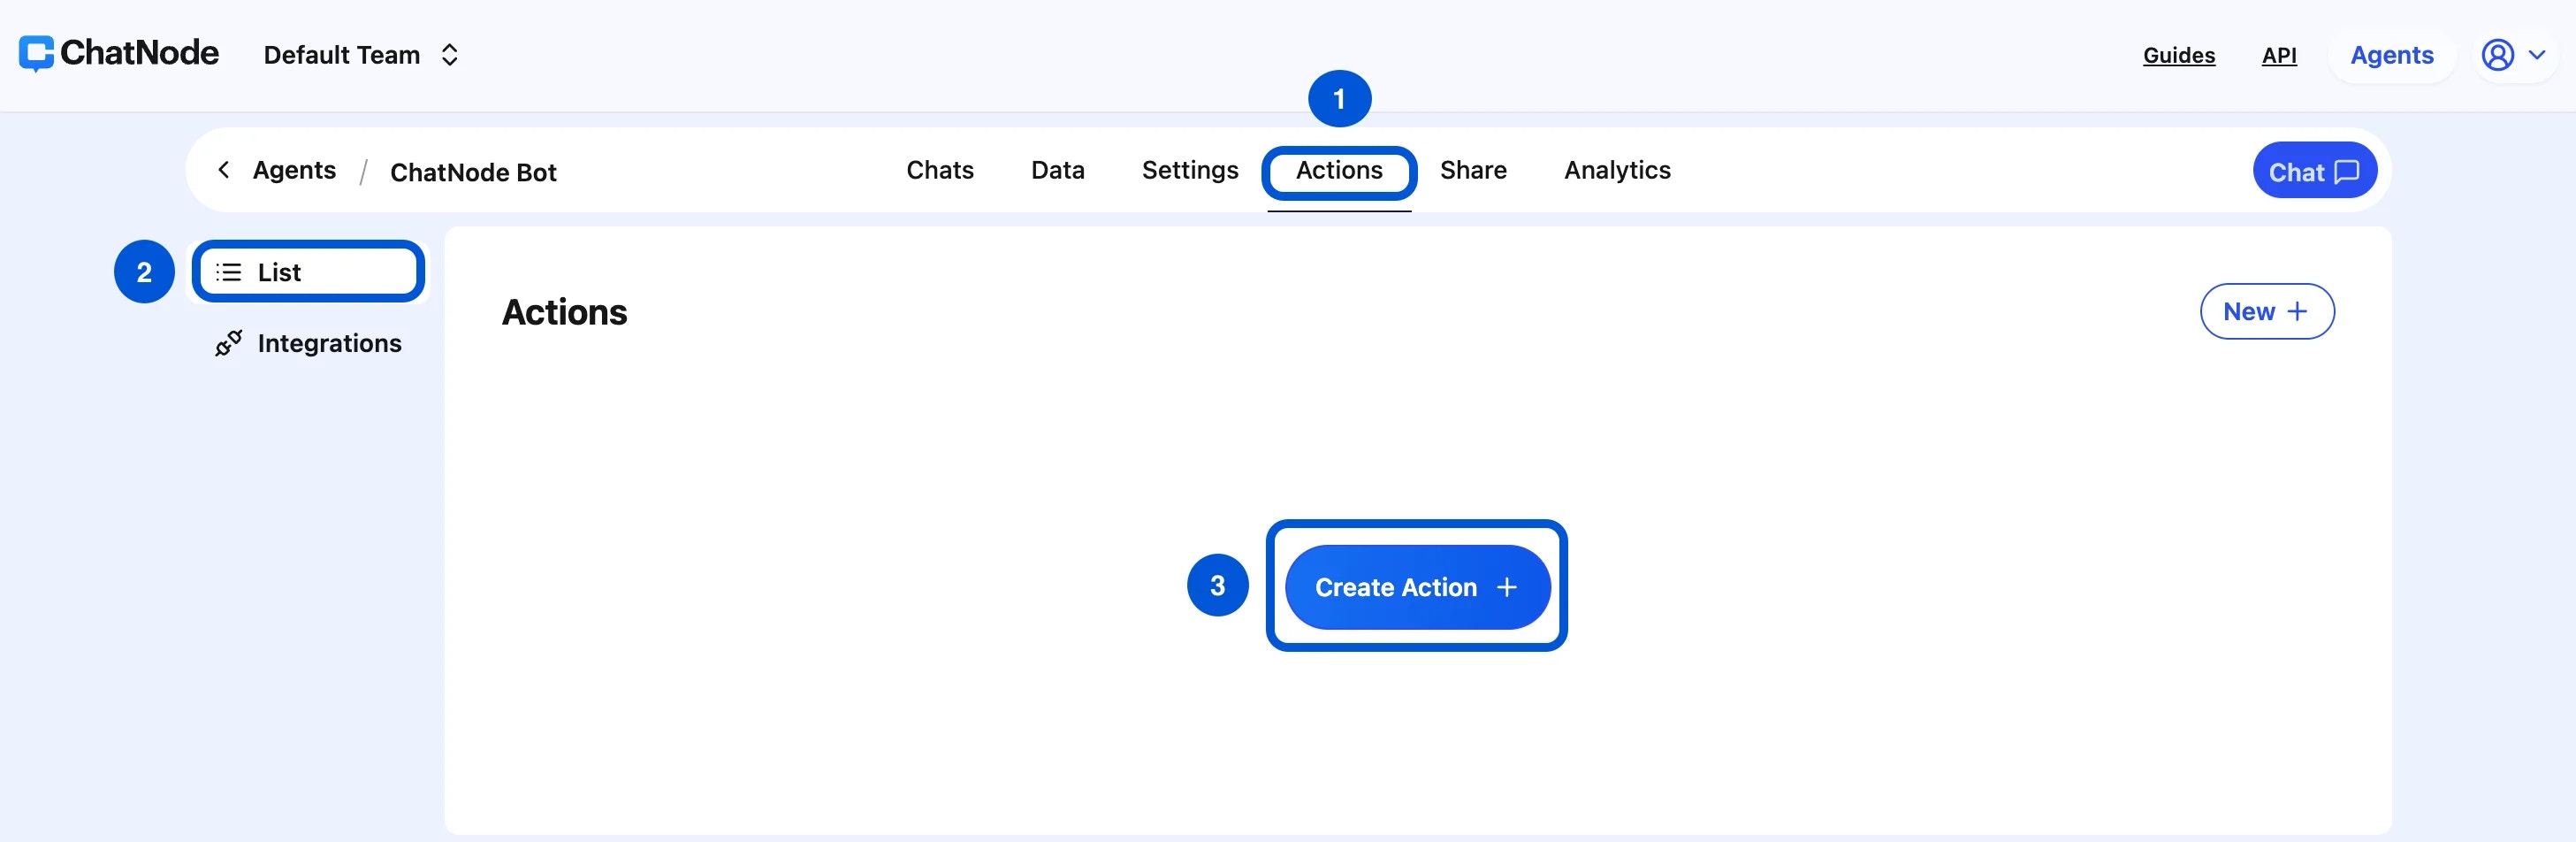
- Choose Client Action under Custom Action.
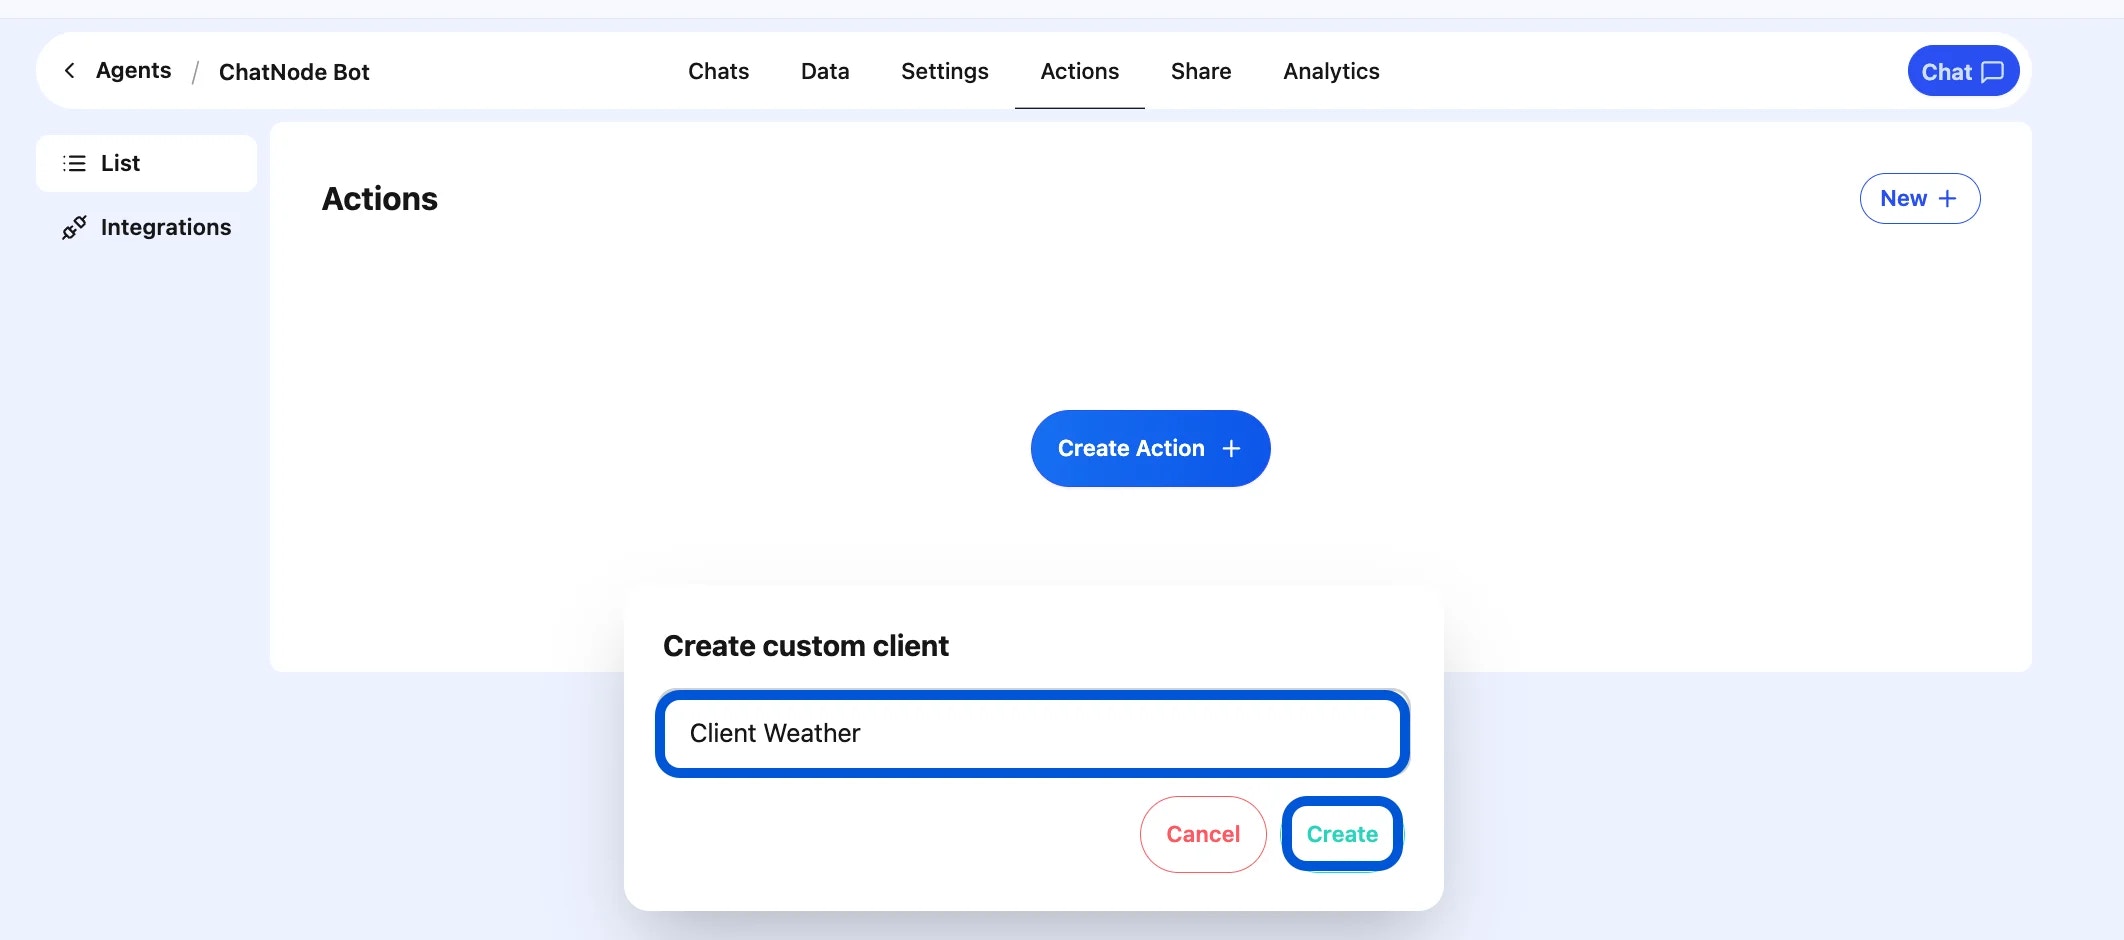
- Enter an Action Title in the pop-up window and click Create.
- You’ll now see the action setup screen, where you can configure the details.
getLocation to detect the user’s browser location.
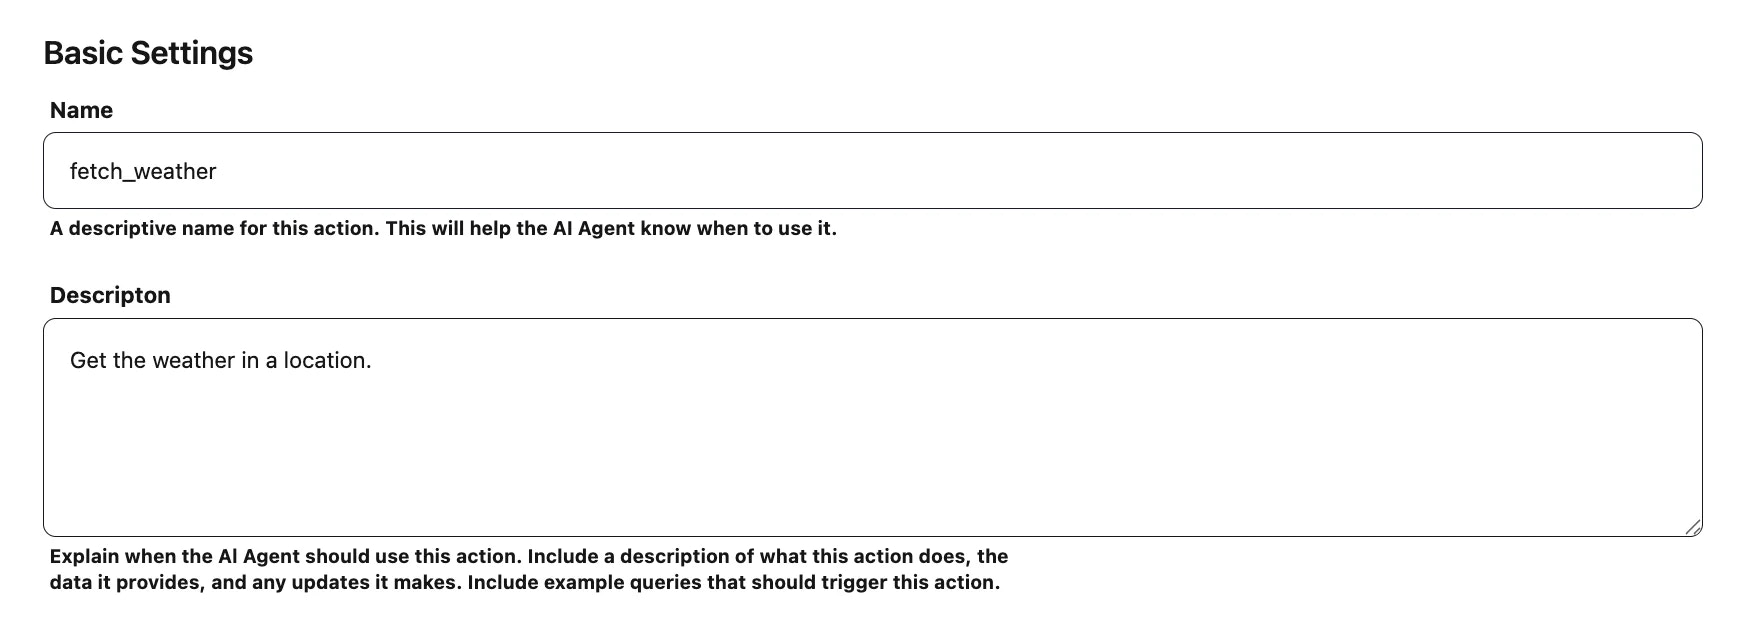
Step 2: Basic Settings
-
Name - Enter a descriptive name.
- Example:
getLocation
- Example:
-
Description - Explain what the action does and when it should be used.
- Example: Detects the user’s current location using the browser and returns the coordinates for nearby content.
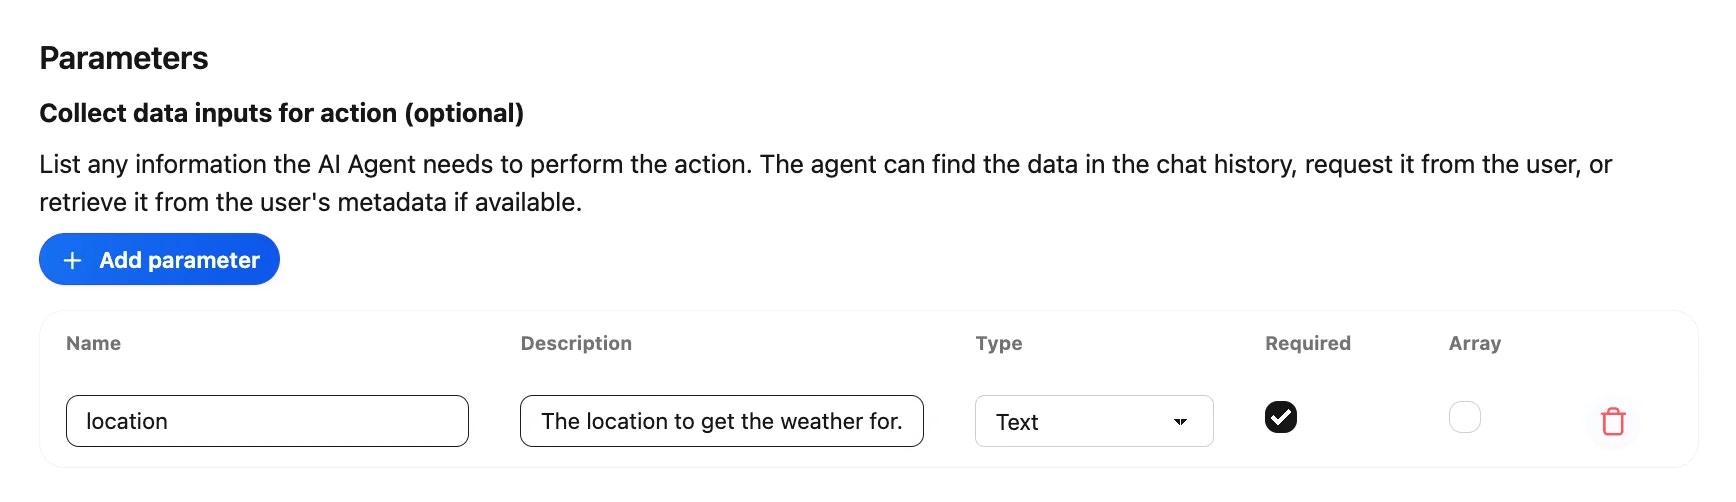
Step 3: Add Parameters (Optional)
Parameters allow you to collect input data that the client action may need.- Click Add Parameter.
-
Fill in the fields:
- Name:
radius - Description: Distance in kilometers around the user’s location to search for restaurants.
- Type: Number
- Required: ✔️
- Name:
Step 4: Enable the Action
At the top of the screen, toggle the switch from Disable → Enable to activate the action. You can disable it later if needed.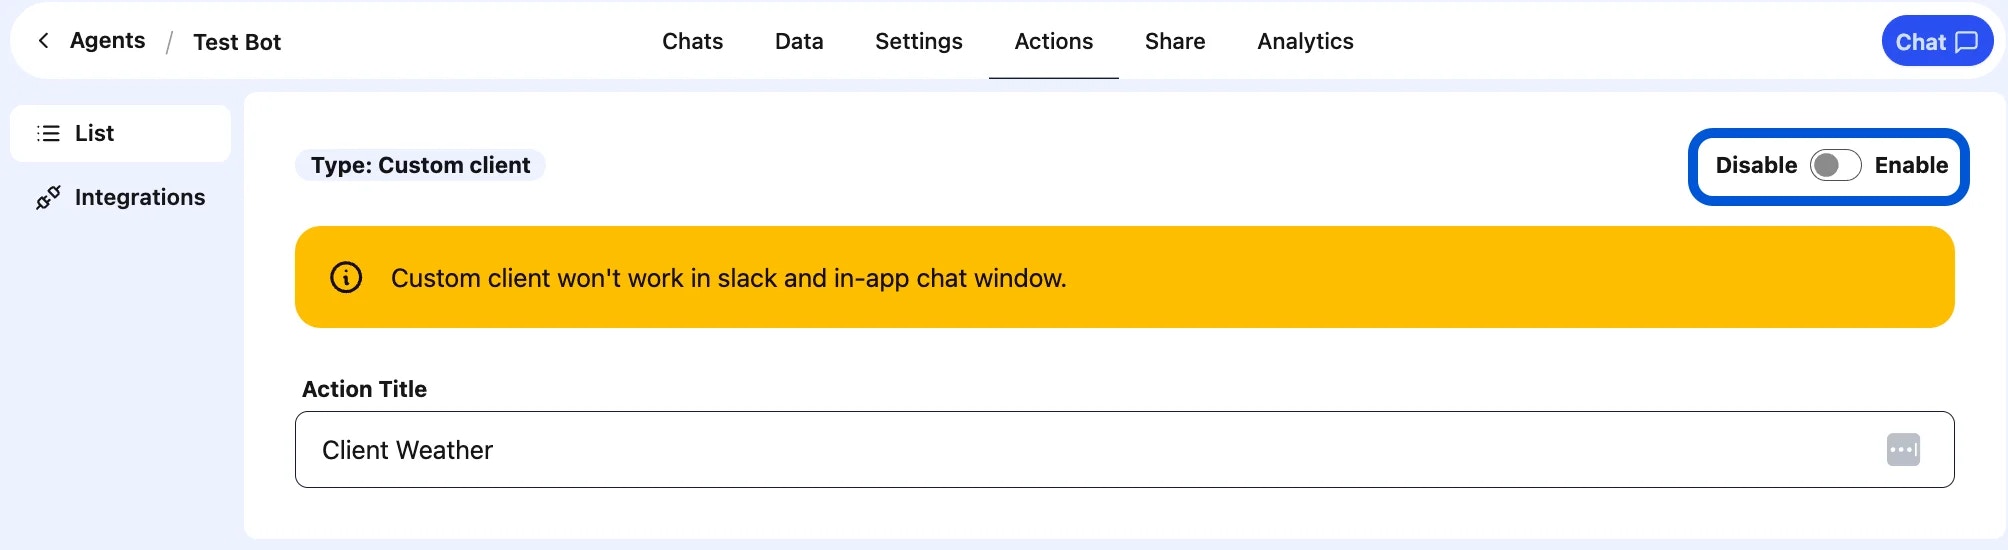
Step 5: Register Tools in Your Client
Finally, register your Client Action in your website or app using theregisterTools method.
See the Developer Guide: registerTools() for details and examples.
Example Workflow
- User asks: “Find coffee shops within 2 km of me.”
- AI Agent triggers the
getLocationClient Action. - The action detects the user’s location using the browser.
- The agent calls a restaurant API with the location and radius.
- Response: “Here are 3 restaurants within 2 km of your current location.”