> ## Documentation Index
> Fetch the complete documentation index at: https://docs.chatnode.ai/docs/llms.txt
> Use this file to discover all available pages before exploring further.
# Custom Domain
## Understanding Custom Domains
A custom domain allows you to personalize the URL of your agent, aligning it with your brand and providing a seamless user experience. Instead of using a generic ChatNode URL, you can have your agent accessible through a domain like `chat.yourcompany.com`.
ChatNode offers the custom domain feature as part of its **Scale plan**, priced at **\$377 per month**. This plan includes the ability to use your own custom domain, among other advanced features.
If you're on a different plan and still want a custom domain, you can **purchase it as an add-on for \$53/month**.
By utilizing a custom domain, you enhance your brand’s professionalism and ensure a consistent experience for your users.
## How to Add a Custom Domain to Your Agent
### Step 1: Log in to Your ChatNode Account
Once logged in, you’ll see your dashboard displaying your agents.
### Step 2: Select Your Bot
Click on the agent you want to customize. This will take you to the bot’s settings and management page.
### Step 3: Navigate to the "Share" Tab
In the agent’s settings, click on the **Share** tab located in the navigation menu at the top of the page. This tab contains options for embedding your agent and customizing its domain.
### Step 4: Scroll Down to the Custom Domain Section
Scroll down the page until you see the **Custom Domain** section. This is where you can link a custom domain to your agent.
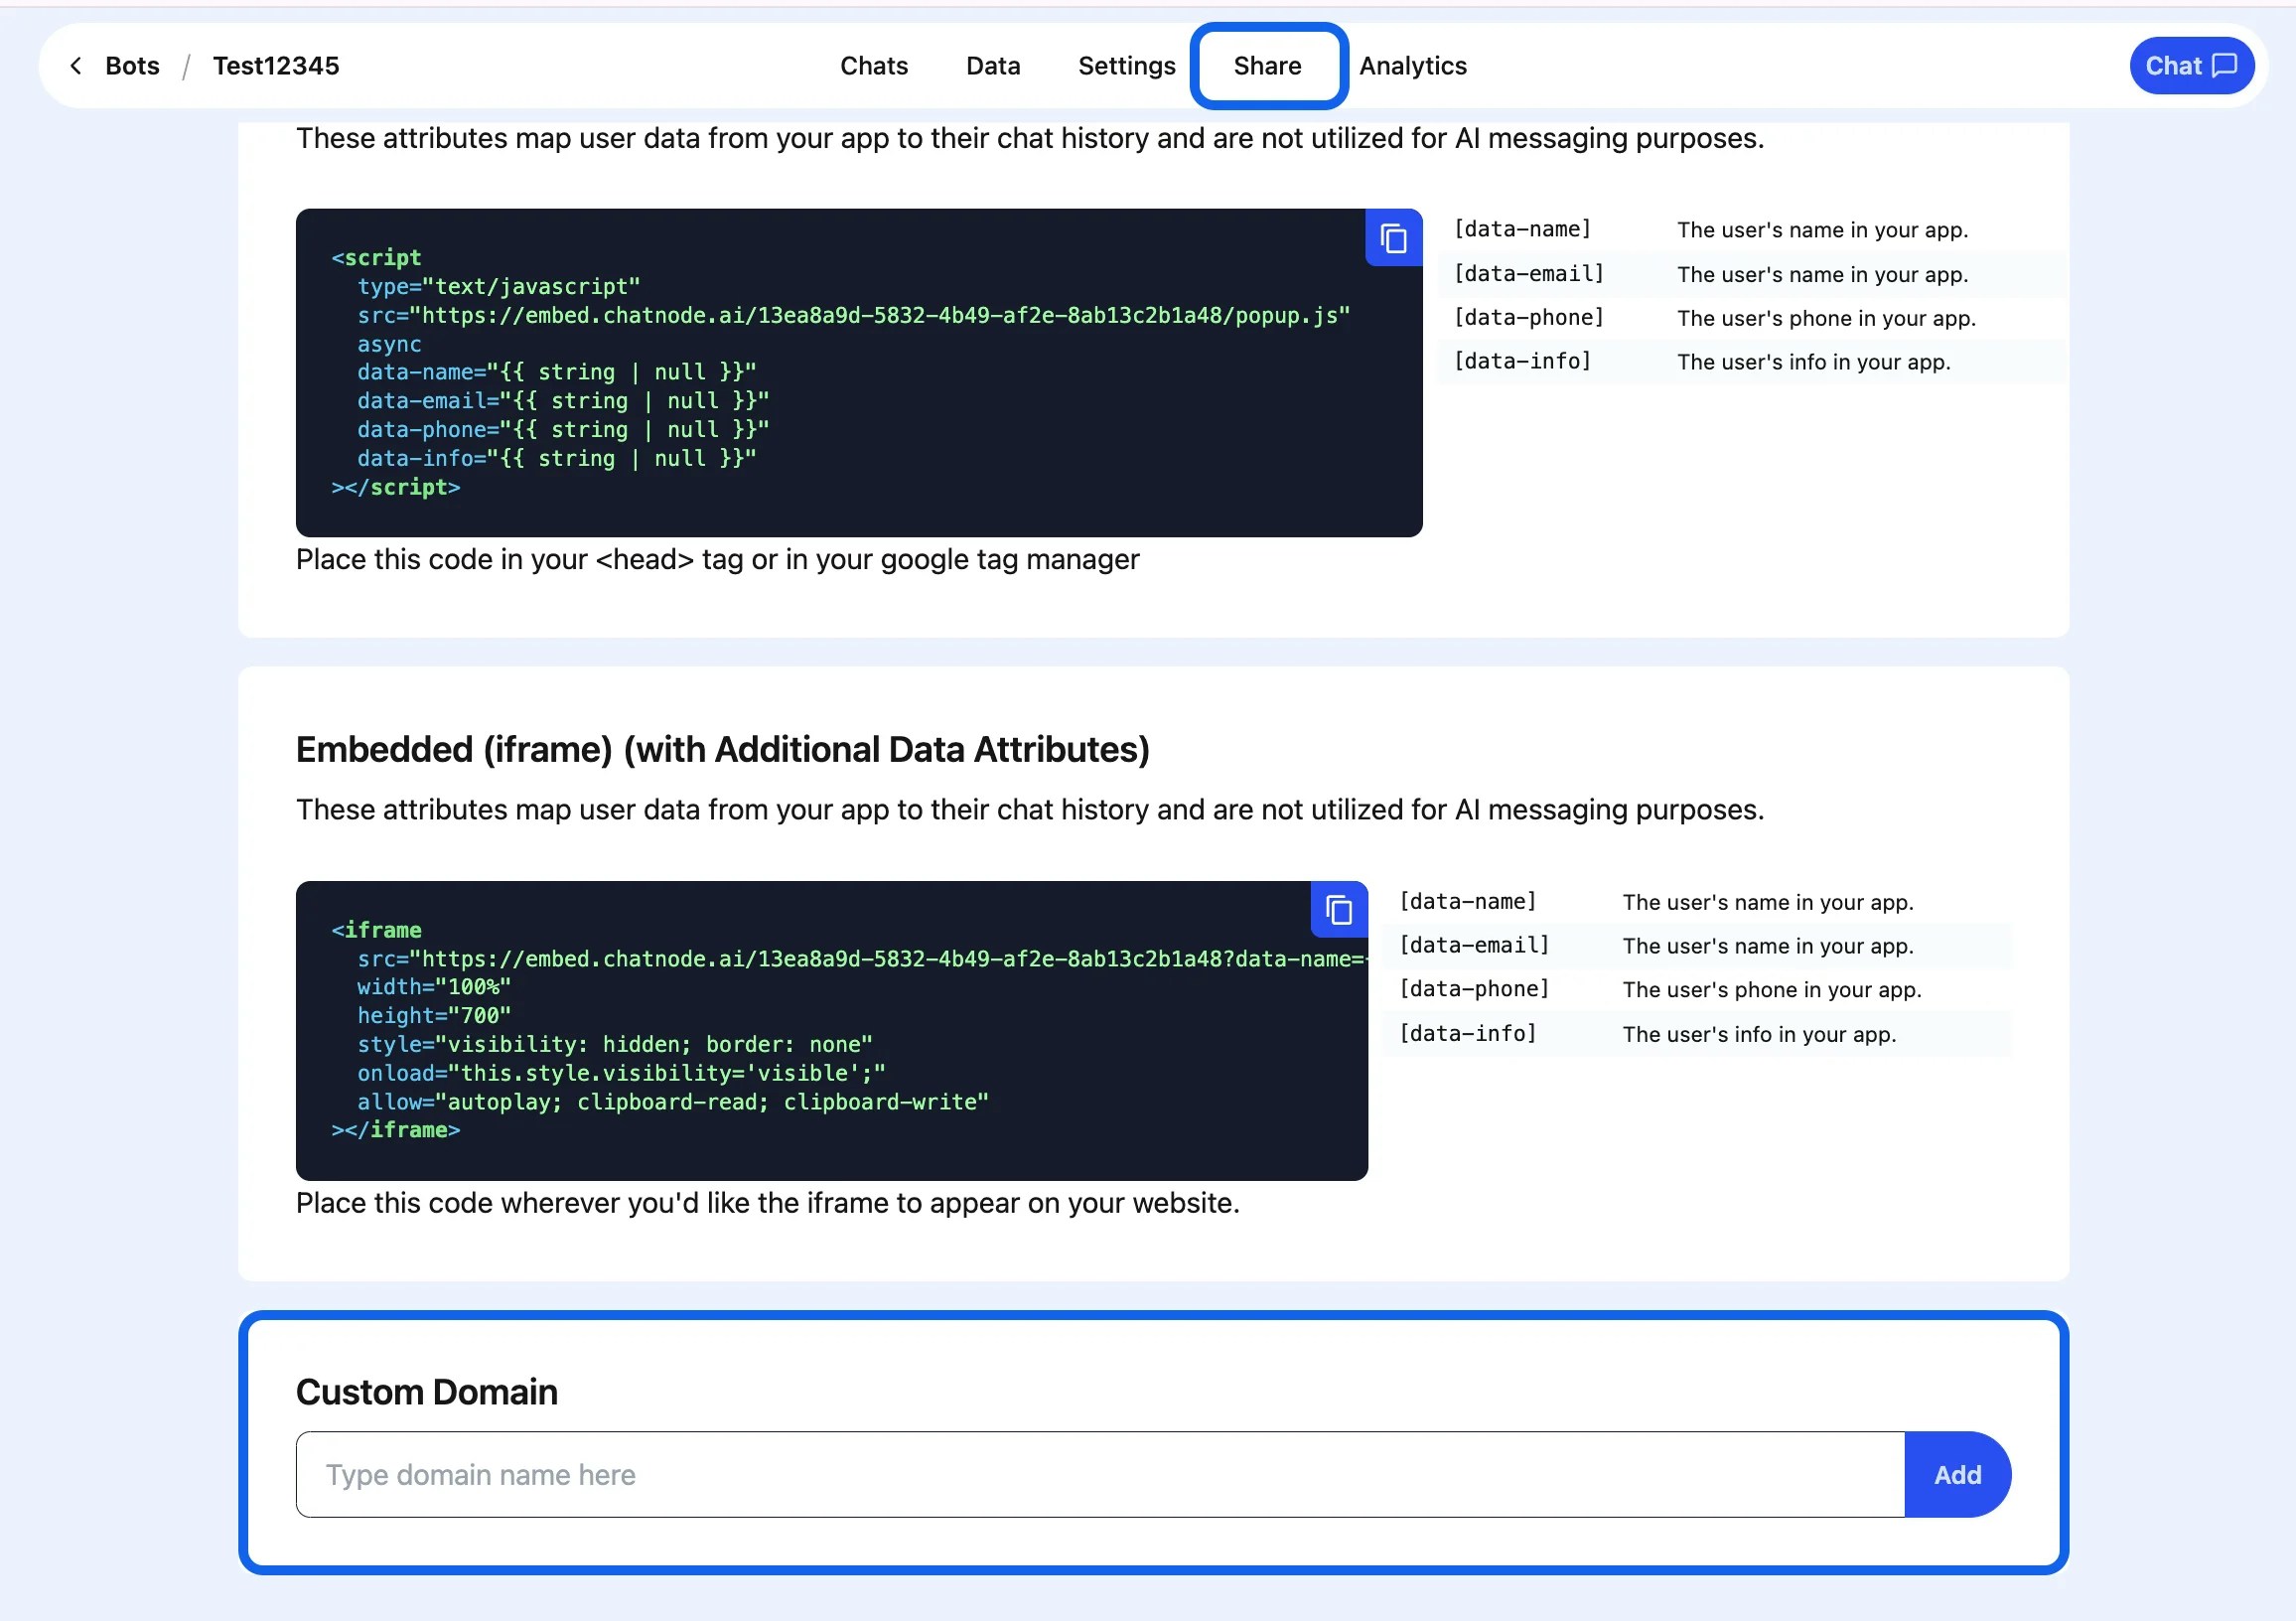 ### Step 5: Enter Your Custom Domain
In the **Custom Domain** field, type the domain name you want to assign to your agent. Ensure that the domain name is valid and properly configured in your DNS settings to point to ChatNode’s servers.
### Step 6: Click the "Add" Button
After entering your domain name, click the **Add** button. ChatNode will process your request and link the custom domain to your agent. You should see a confirmation message once the domain has been successfully added.
### Step 5: Enter Your Custom Domain
In the **Custom Domain** field, type the domain name you want to assign to your agent. Ensure that the domain name is valid and properly configured in your DNS settings to point to ChatNode’s servers.
### Step 6: Click the "Add" Button
After entering your domain name, click the **Add** button. ChatNode will process your request and link the custom domain to your agent. You should see a confirmation message once the domain has been successfully added.
 ### Step 7: Verify Your Domain
To complete the setup, ensure your domain’s DNS records are correctly configured. You may need to add a CNAME or A record pointing to ChatNode’s servers. Consult your domain provider’s documentation for detailed instructions on updating DNS records.
### Additional Tips
* Ensure that your domain’s SSL certificate is correctly configured to provide a secure connection for your agent.
* Test your custom domain by entering it in a browser to verify that it redirects to your agent.
By following these steps, you can seamlessly integrate your agent with a custom domain, improving its accessibility and reflecting your brand identity.
### Step 7: Verify Your Domain
To complete the setup, ensure your domain’s DNS records are correctly configured. You may need to add a CNAME or A record pointing to ChatNode’s servers. Consult your domain provider’s documentation for detailed instructions on updating DNS records.
### Additional Tips
* Ensure that your domain’s SSL certificate is correctly configured to provide a secure connection for your agent.
* Test your custom domain by entering it in a browser to verify that it redirects to your agent.
By following these steps, you can seamlessly integrate your agent with a custom domain, improving its accessibility and reflecting your brand identity.