> ## Documentation Index
> Fetch the complete documentation index at: https://docs.chatnode.ai/docs/llms.txt
> Use this file to discover all available pages before exploring further.
# Custom Form
## Overview
**Custom Form** lets you create forms with fields that the AI Agent can use to collect and validate user inputs.
**Example:** A profile update form that asks for name, email, and preferences.
This feature is useful for **lead generation, surveys, customer support, and profile management**.
## How to Create a Custom Form
### **Step 1: Create a Custom Form**
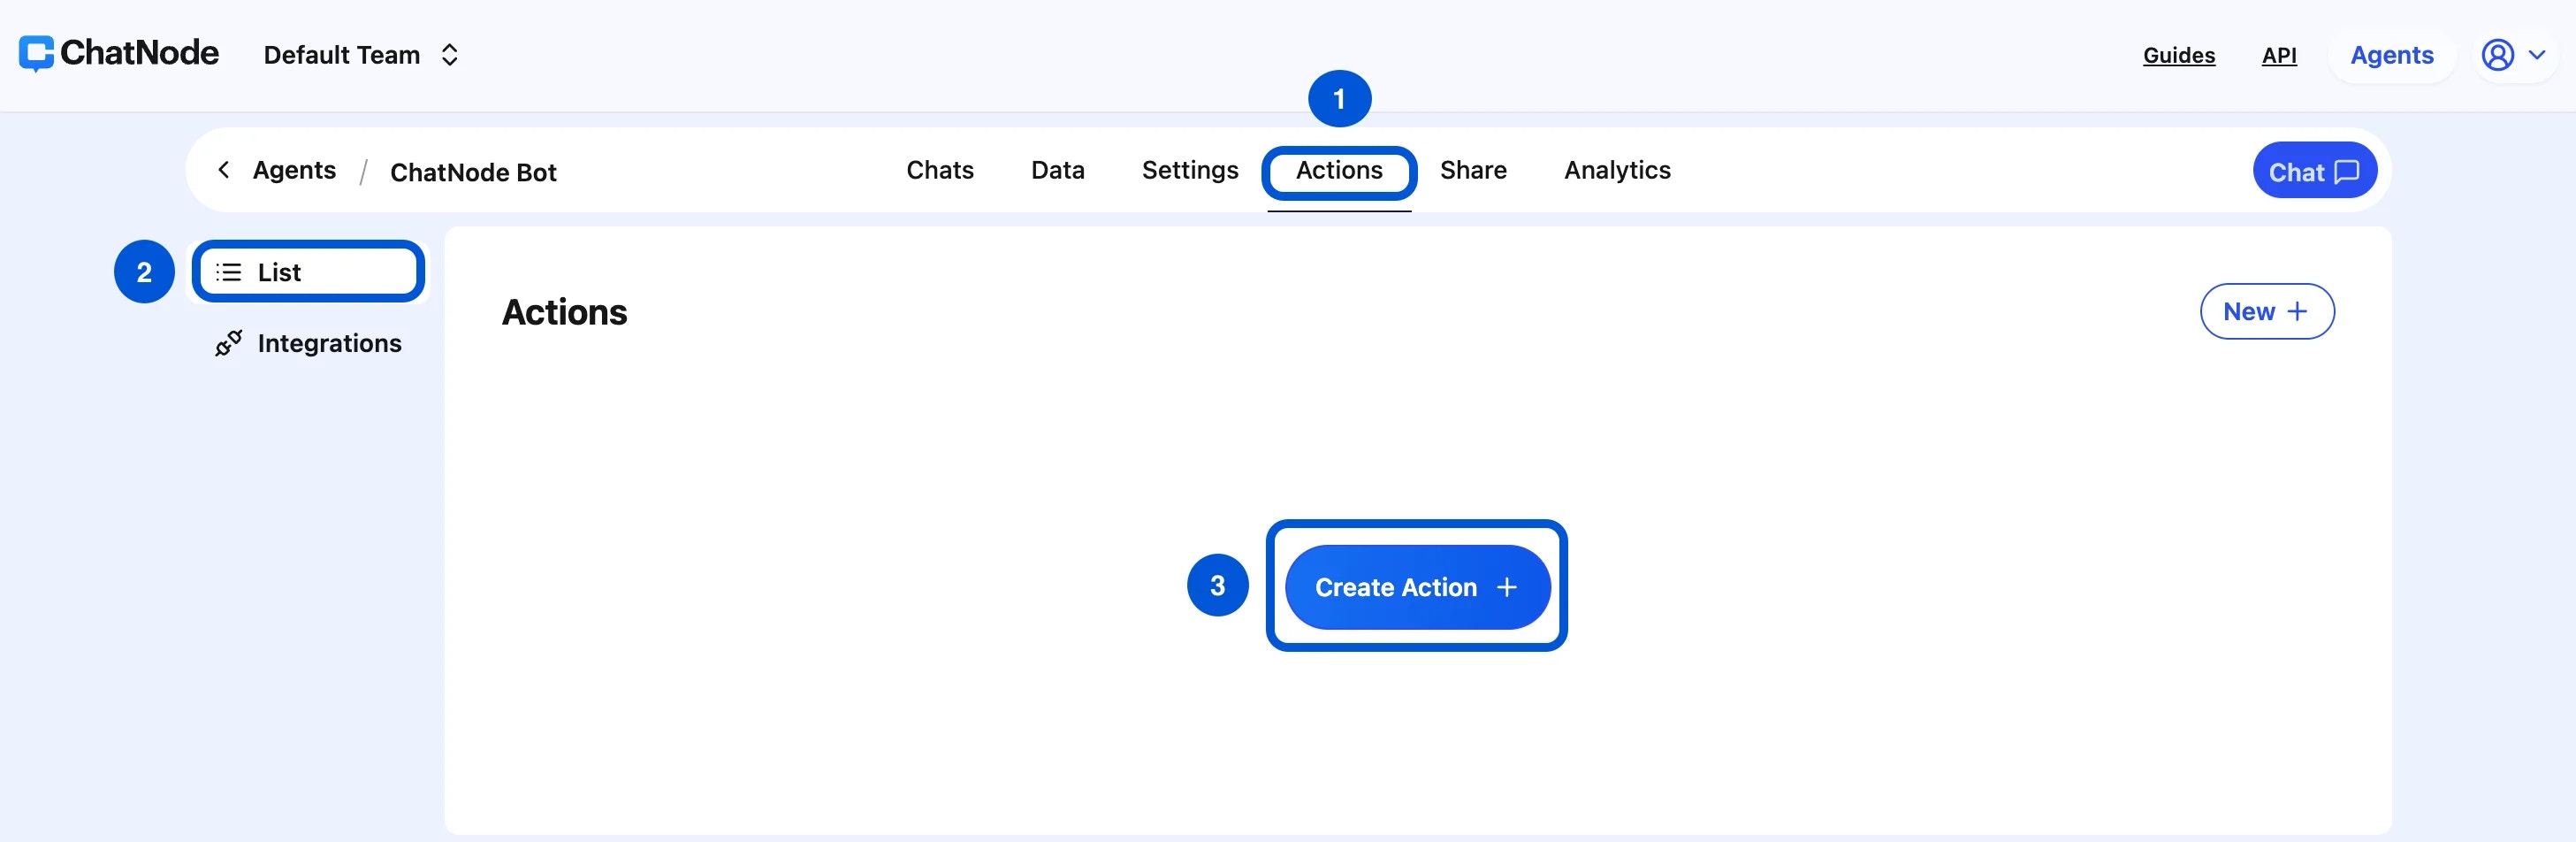
1. Go to the **Actions** tab.
2. Click **List** from the left-hand menu.
3. Select **Create Action**.
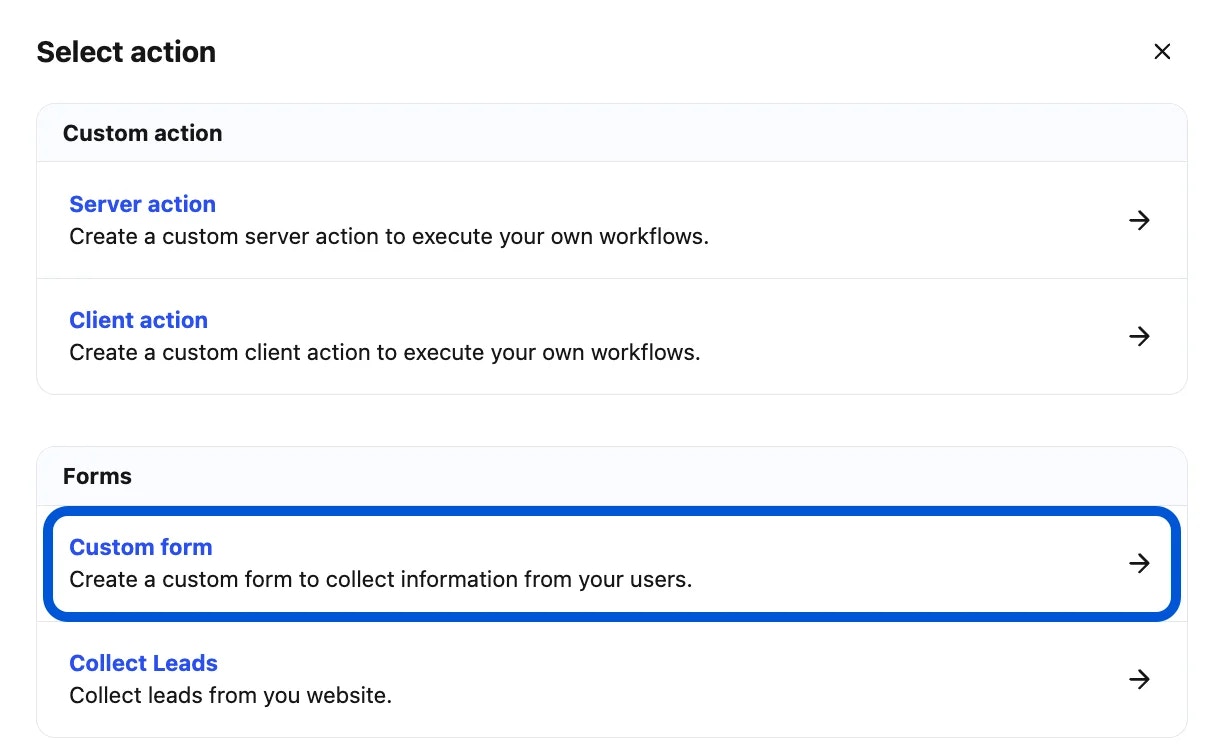
 4. Choose **Custom Form** under Forms.
 5. Enter an **Action Title** in the pop-up window and click **Create**.
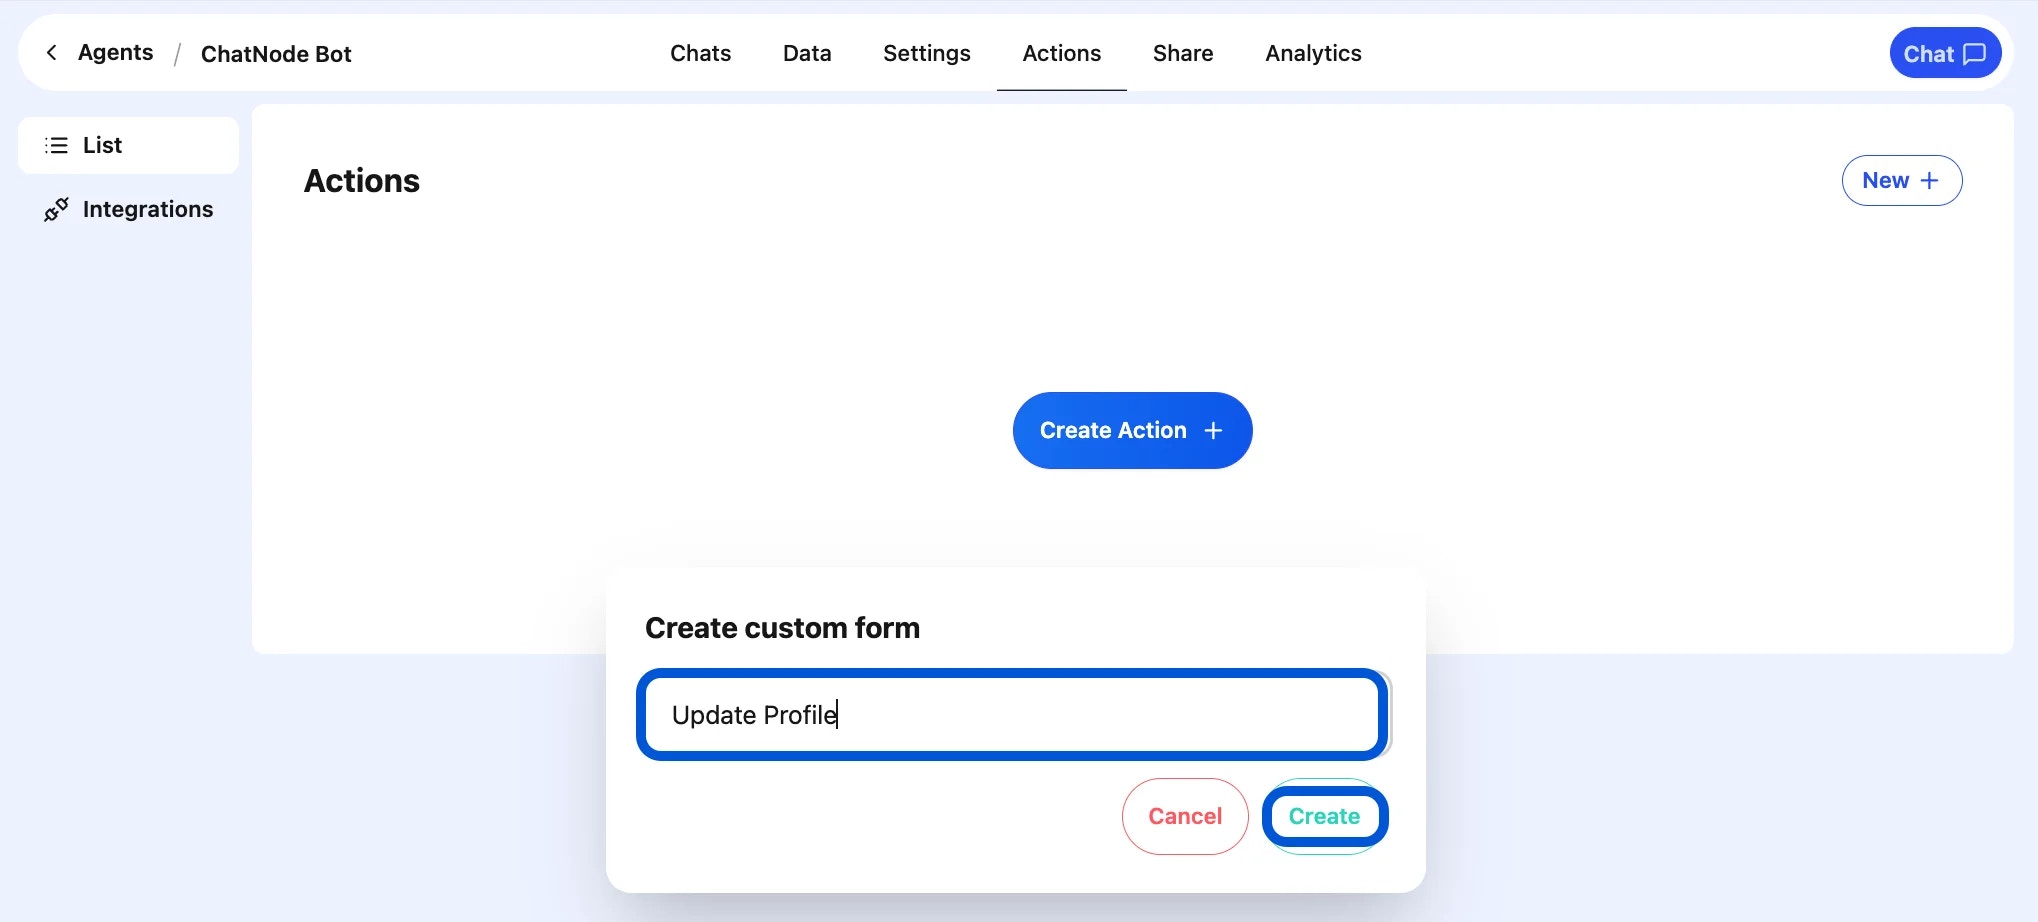 6. You'll now see the form configuration screen.
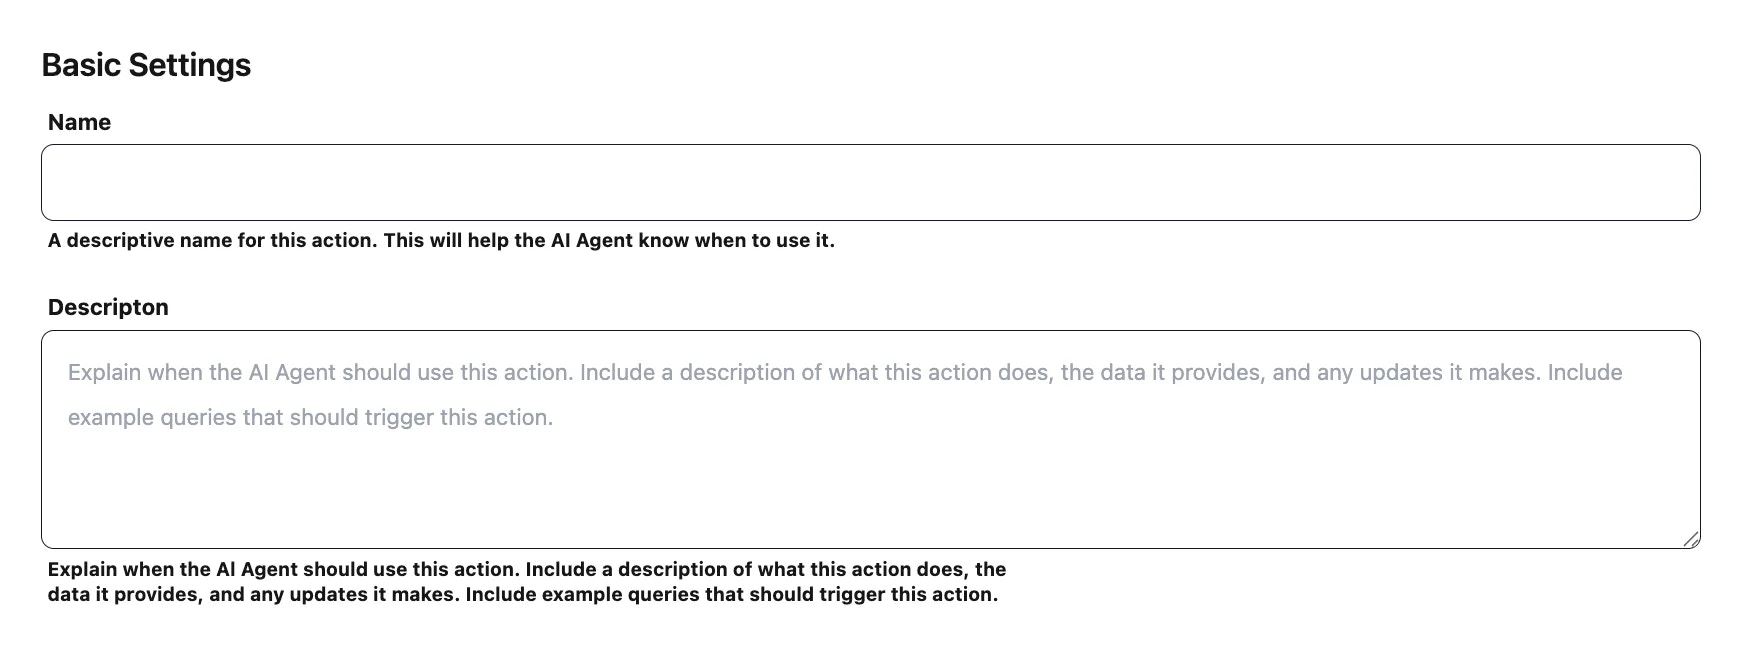
### **Step 2: Basic Settings**
* **Name** → A descriptive name for the form. (e.g., update\_profile)
* **Description** → Explain when this form should be used. (e.g., **Collect user details to update their account.**)
6. You'll now see the form configuration screen.
### **Step 2: Basic Settings**
* **Name** → A descriptive name for the form. (e.g., update\_profile)
* **Description** → Explain when this form should be used. (e.g., **Collect user details to update their account.**)
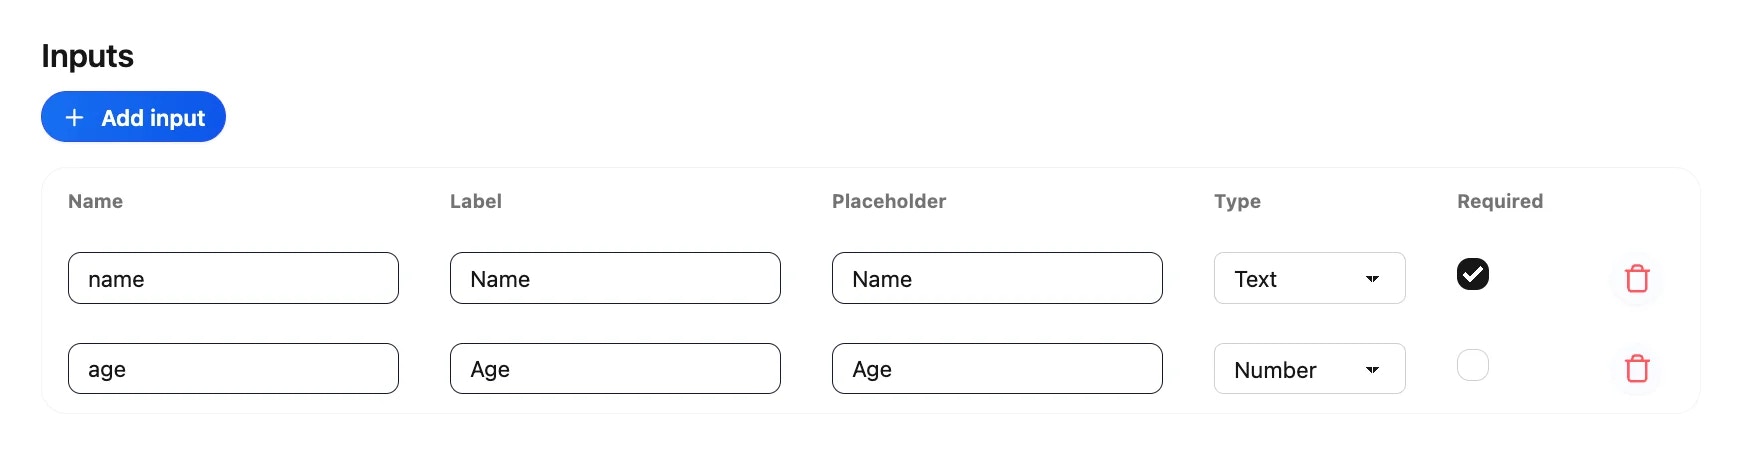
 ### **Step 4: Add Inputs**
Each input represents a field in the form.
1. Click **Add Input**.
2. Define the field:
* **Name** → Internal field name (e.g., email).
* **Label** → User-facing text (e.g., **Email Address**).
* **Placeholder** → Hint text (e.g., **Enter your email**).
* **Type** → Select from Text, Email, Number, etc.
* **Required** → Mark if mandatory.
Example Inputs:
* Full Name → Required text field.
* Email Address → Required email field.
* Preferences → Optional text field.
### **Step 4: Add Inputs**
Each input represents a field in the form.
1. Click **Add Input**.
2. Define the field:
* **Name** → Internal field name (e.g., email).
* **Label** → User-facing text (e.g., **Email Address**).
* **Placeholder** → Hint text (e.g., **Enter your email**).
* **Type** → Select from Text, Email, Number, etc.
* **Required** → Mark if mandatory.
Example Inputs:
* Full Name → Required text field.
* Email Address → Required email field.
* Preferences → Optional text field.
 ### **Step 5: Webhook (Optional)**
Send form submissions to an external system:
* Form data is sent as a **POST request in JSON format**.
* Configure the webhook endpoint in the **Settings tab**.
* Example Event Name: update\_profile\_custom\_form
### **Step 5: Webhook (Optional)**
Send form submissions to an external system:
* Form data is sent as a **POST request in JSON format**.
* Configure the webhook endpoint in the **Settings tab**.
* Example Event Name: update\_profile\_custom\_form
 ### **Step 6: Enable the Form**
At the top of the page, toggle from **Disable → Enable** to activate the form.
### **Step 6: Enable the Form**
At the top of the page, toggle from **Disable → Enable** to activate the form.
 ## **Example Workflow**
1. User: **“I want to update my profile.”**
2. AI Agent triggers the **Custom Form**.
3. User fills in their **Name, Email, Preferences**.
4. AI Agent confirms: **“Your profile has been updated successfully!”**
5. (Optional) Data is sent to your backend via webhook.
With **Custom Forms**, your AI Agent can **collect structured inputs**, validate them, and pass them on to your systems — making it a powerful tool for onboarding, feedback, and customer data collection.
## **Example Workflow**
1. User: **“I want to update my profile.”**
2. AI Agent triggers the **Custom Form**.
3. User fills in their **Name, Email, Preferences**.
4. AI Agent confirms: **“Your profile has been updated successfully!”**
5. (Optional) Data is sent to your backend via webhook.
With **Custom Forms**, your AI Agent can **collect structured inputs**, validate them, and pass them on to your systems — making it a powerful tool for onboarding, feedback, and customer data collection.