> ## Documentation Index
> Fetch the complete documentation index at: https://docs.chatnode.ai/docs/llms.txt
> Use this file to discover all available pages before exploring further.
# Server Action
## Overview
Custom server actions allow your AI Agent to connect with external APIs, fetch real-time information, and provide more dynamic responses. In this guide, we'll walk through setting up a **weather API action** that retrieves weather details for a given location.
## How to Create a Custom Server Action
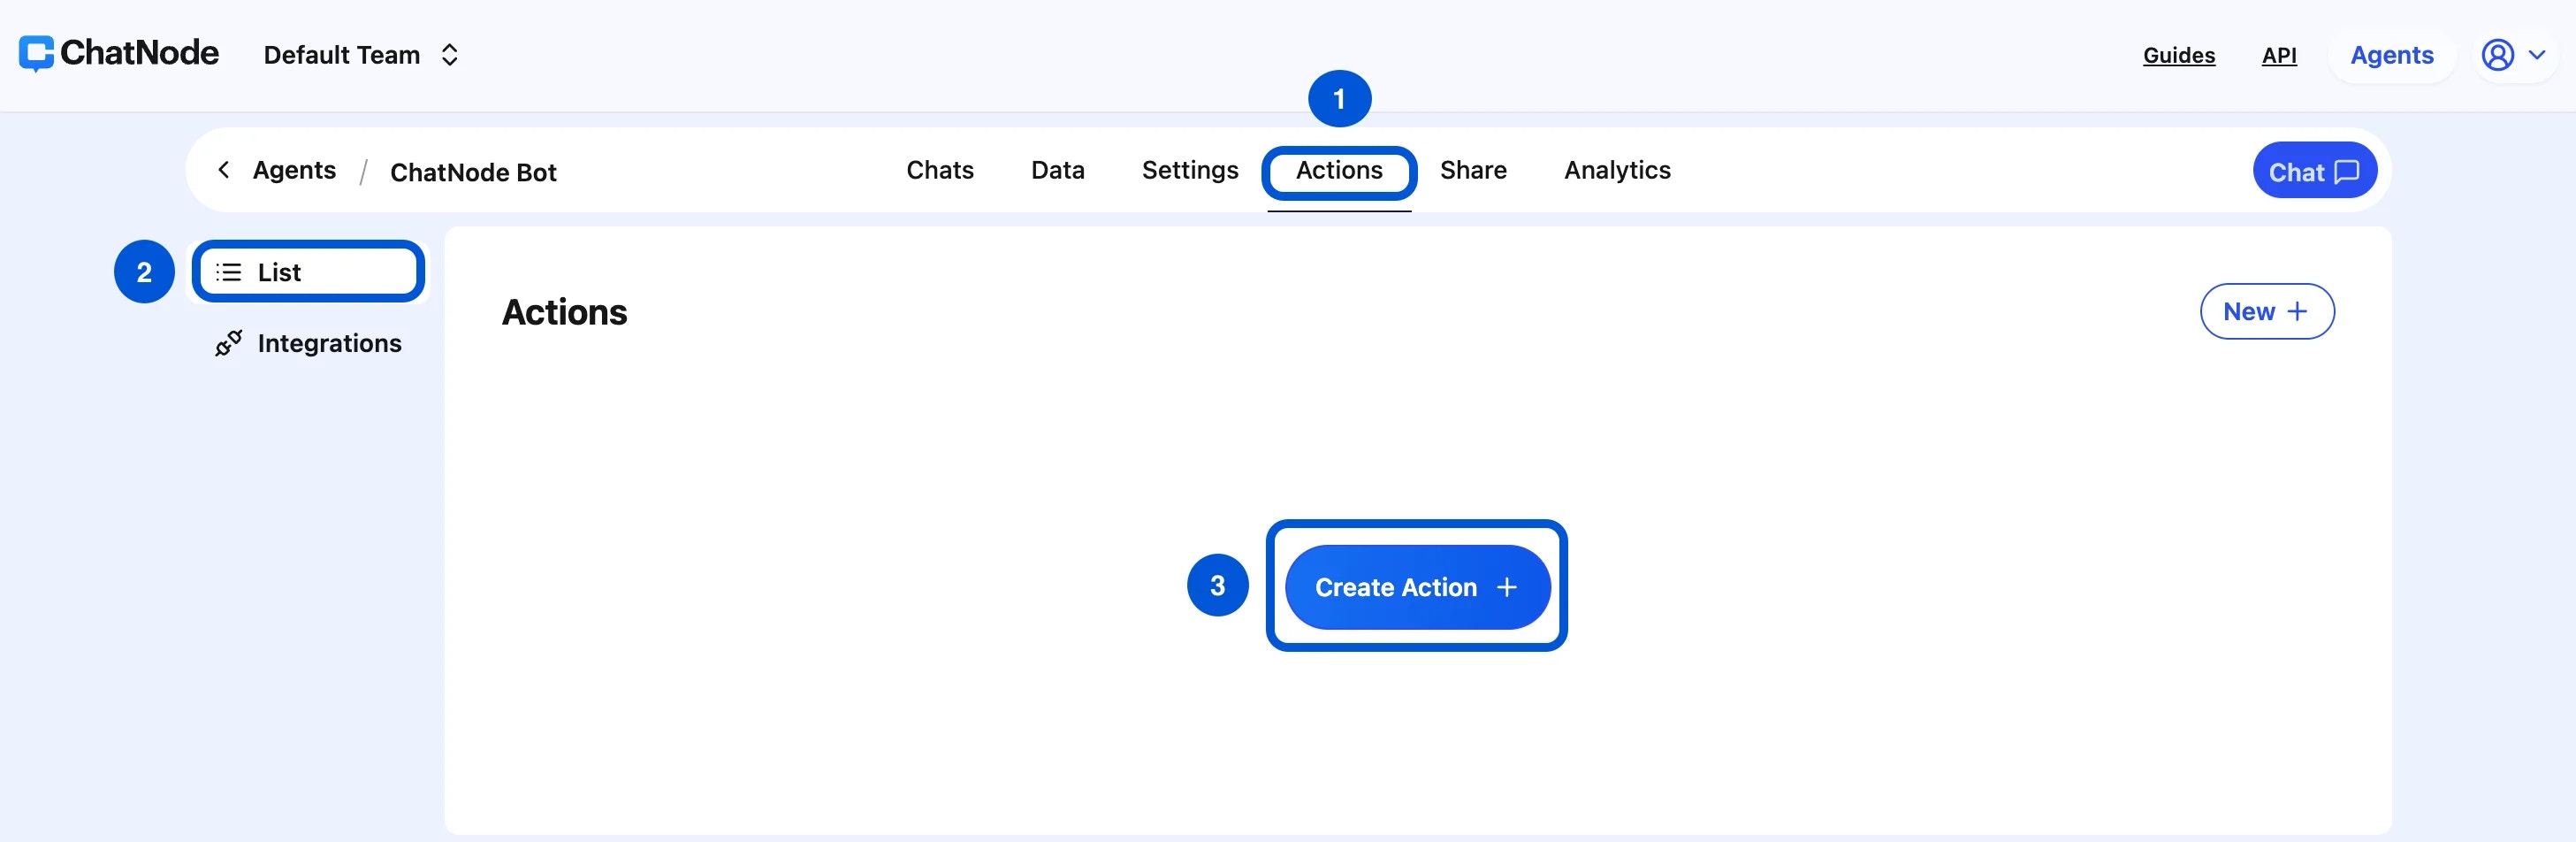
### Step 1: Create a Custom Server Action
1. Go to the **Actions** tab.
2. Click **List** from the left-hand menu.
3. Select **Create Action**.
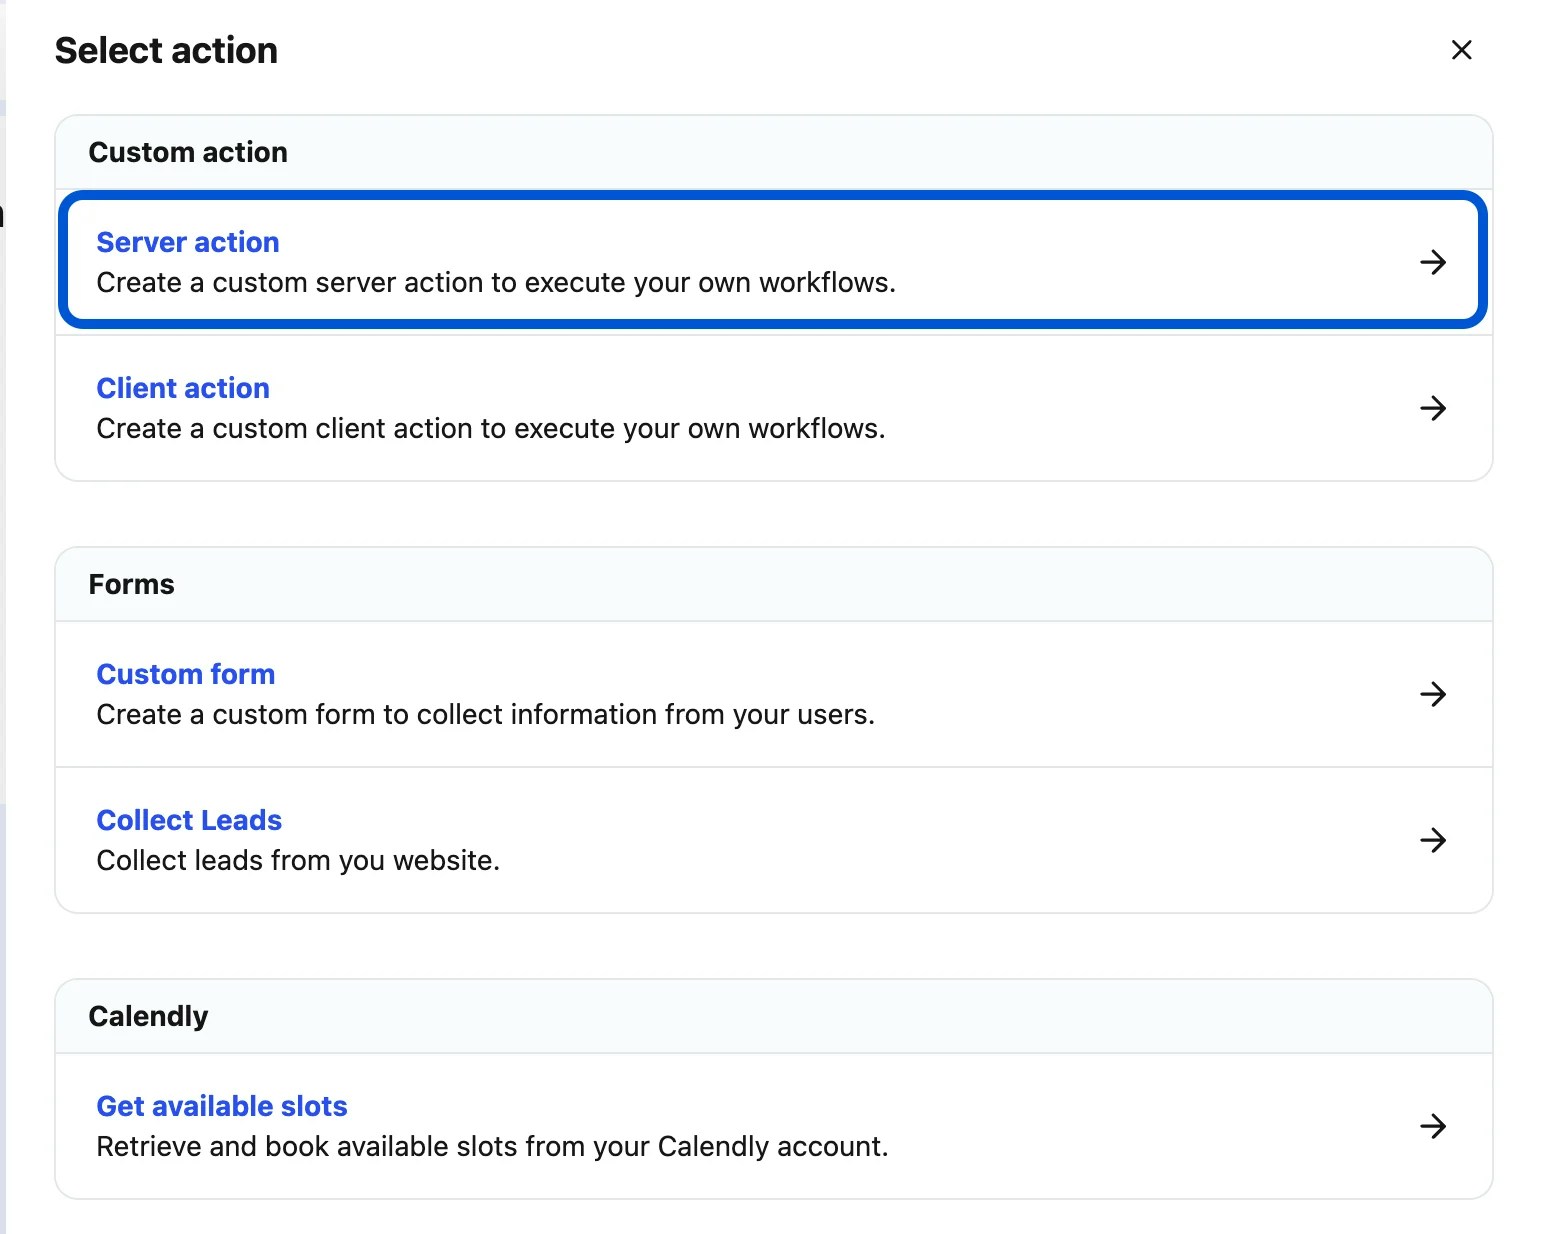
 4. Choose **Server Action** under **Custom Action**.
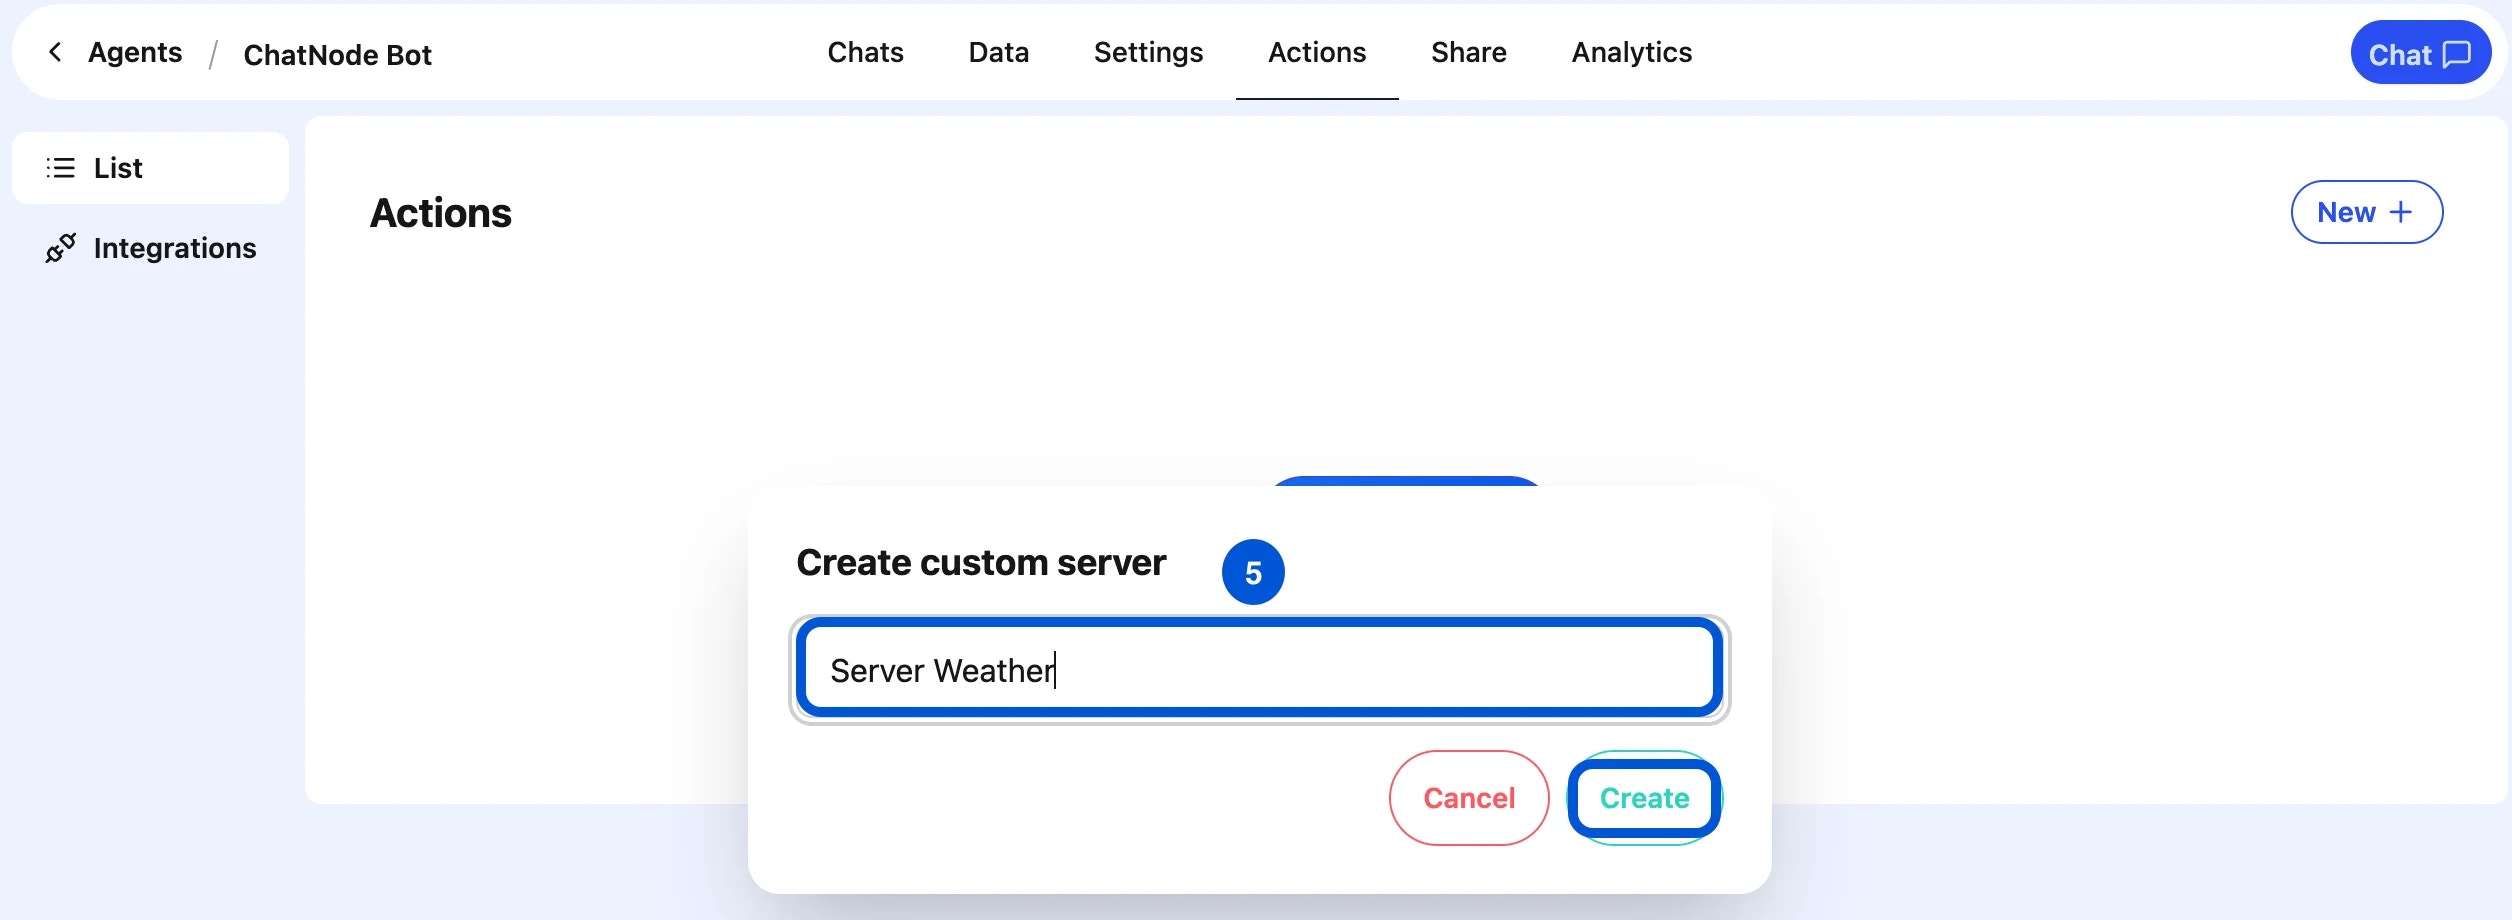
 5. Enter an **Action Title** in the pop-up window and click **Create**.
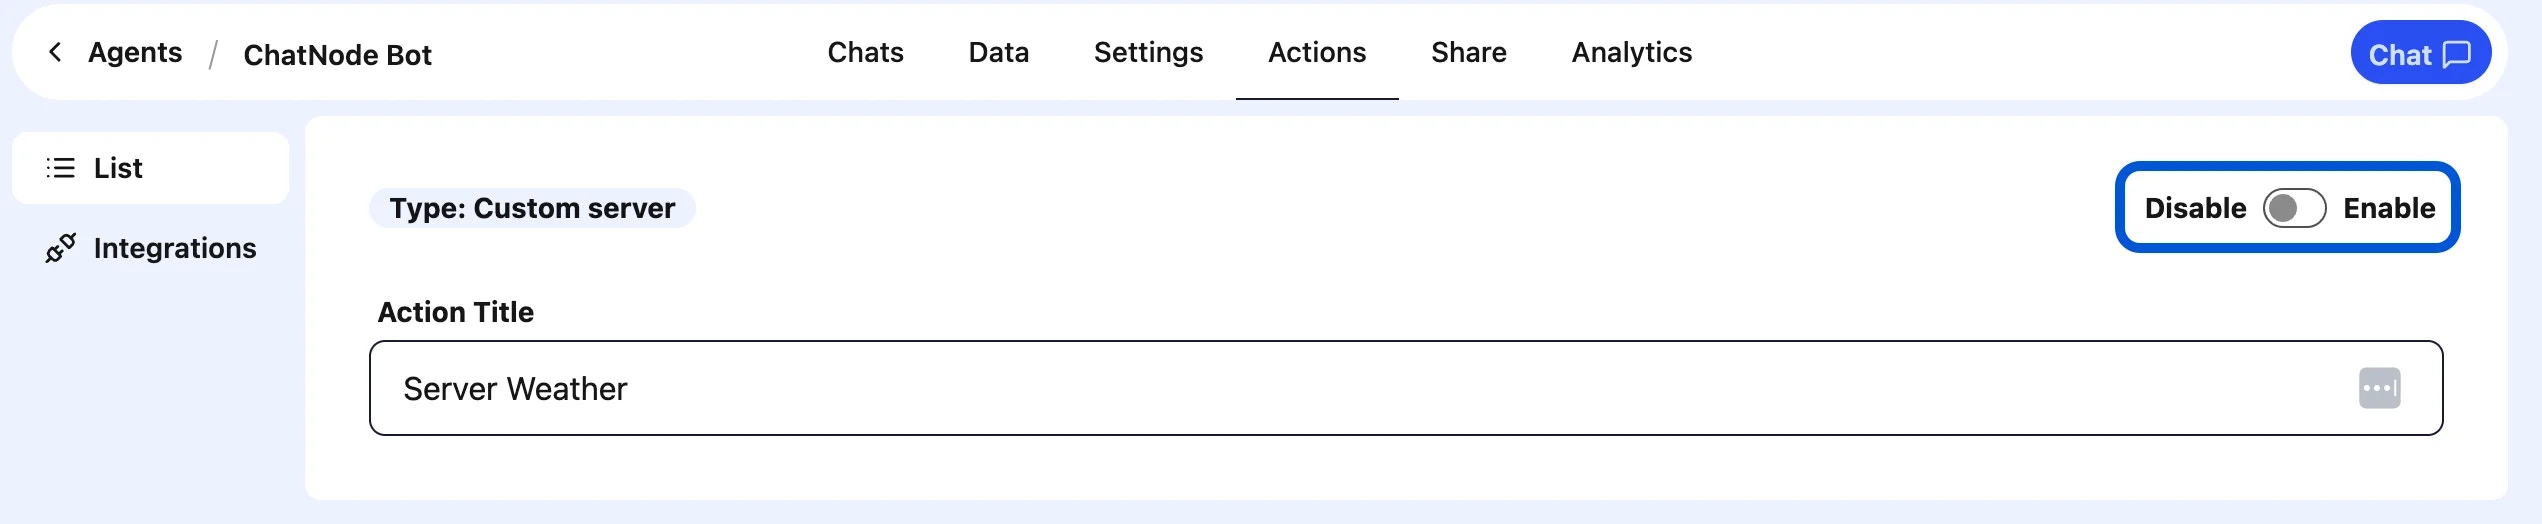
 6. You will then see the action details page, where you can enable or disable the action.
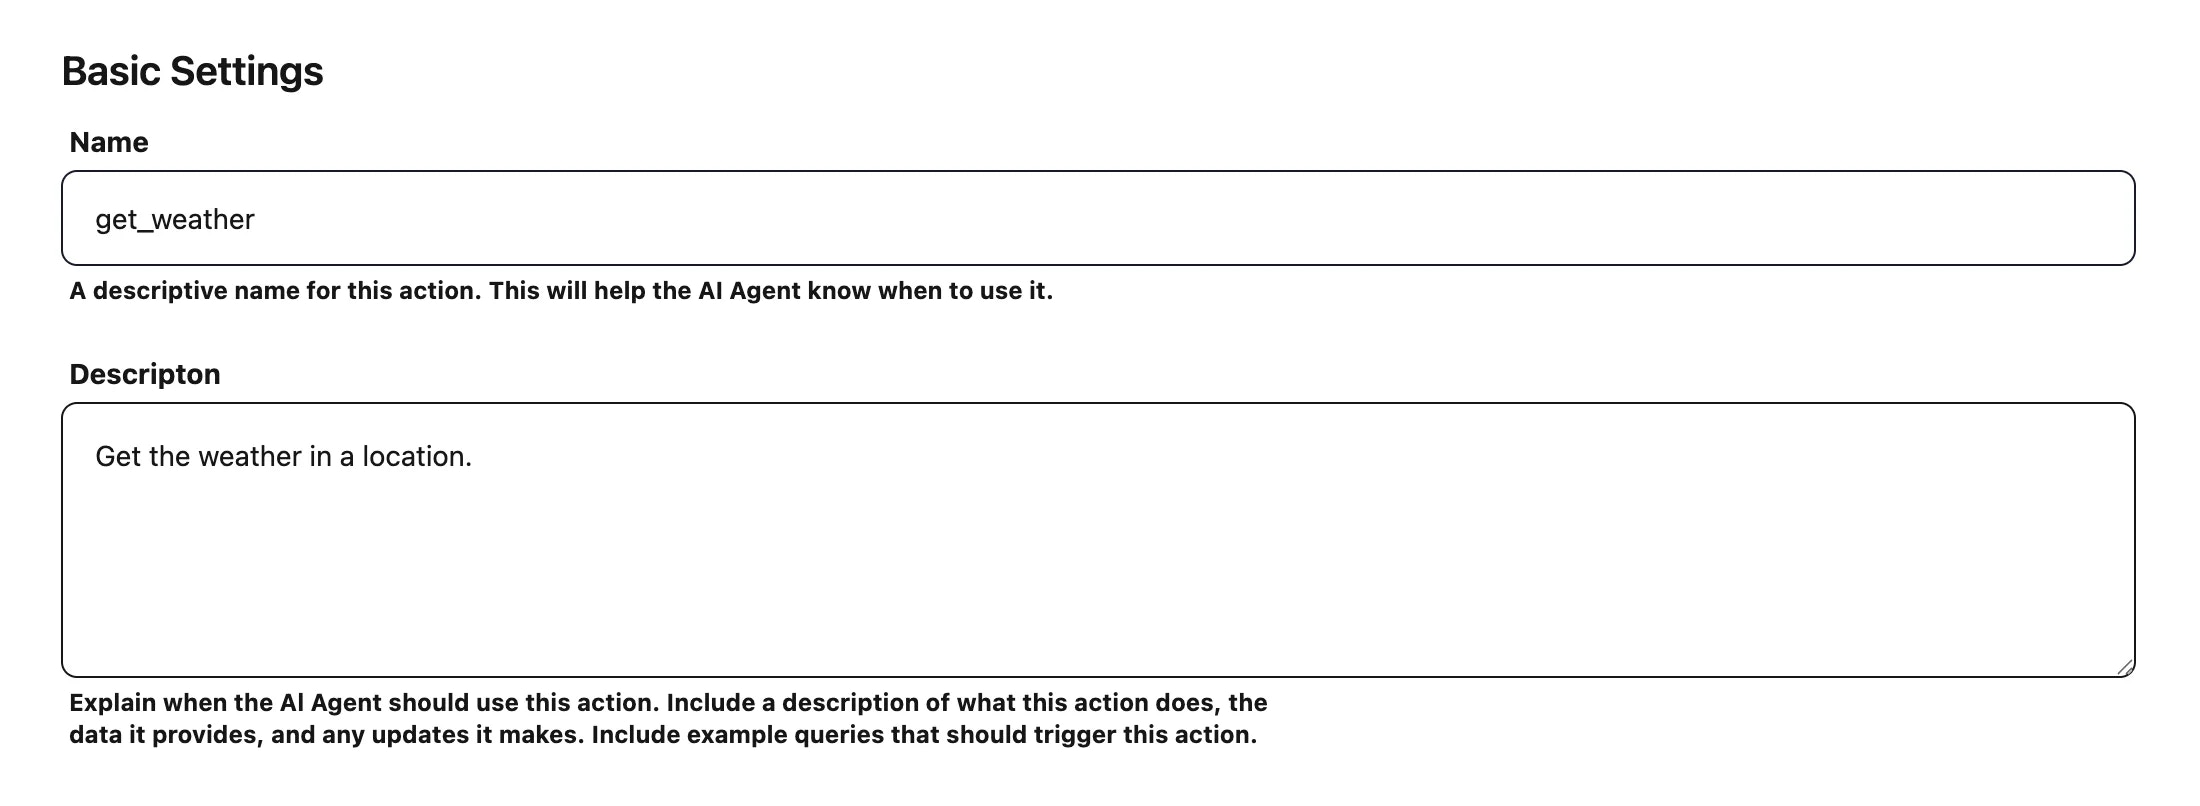
 ### Step 2: Basic Settings
1. **Name**:
Enter a descriptive name for the action.
* Example: weather
2. **Description**:
Provide a short explanation of what this action does and when it should be used.
* Example: Get the weather in a location.
This helps the AI Agent identify when to trigger the action.
### Step 2: Basic Settings
1. **Name**:
Enter a descriptive name for the action.
* Example: weather
2. **Description**:
Provide a short explanation of what this action does and when it should be used.
* Example: Get the weather in a location.
This helps the AI Agent identify when to trigger the action.
 ### Step 3: Define Parameters
Parameters are the data inputs the action needs to run. In this case, we want the location from the user.
* **Name**: location
* **Description**: The location to get the weather for.
* **Type**: Text
* **Required**: ✔️ Yes
This ensures the AI Agent always asks for or retrieves a location before calling the weather API.
### Step 4: Configure the API Request
Next, configure the API call that will be made when the action is triggered.
1. **Method**: POST (or GET depending on the API endpoint you're using)
2. **HTTPS URL**: Paste the API or webhook endpoint.
* Example: `https://example.com/weather` (for testing)
3. **Parameters / Headers / Body**:
* You can map the location parameter into the request body or query string, depending on how your weather API expects the input. Parameters can be mapped using mustache templates, as shown in the example: `{{location}}`. This tells the system to dynamically replace the placeholder with the user's actual input when making the API call.
* Example (for JSON body):
```json theme={null}
{
"location": "{{location}}"
}
```
### Step 3: Define Parameters
Parameters are the data inputs the action needs to run. In this case, we want the location from the user.
* **Name**: location
* **Description**: The location to get the weather for.
* **Type**: Text
* **Required**: ✔️ Yes
This ensures the AI Agent always asks for or retrieves a location before calling the weather API.
### Step 4: Configure the API Request
Next, configure the API call that will be made when the action is triggered.
1. **Method**: POST (or GET depending on the API endpoint you're using)
2. **HTTPS URL**: Paste the API or webhook endpoint.
* Example: `https://example.com/weather` (for testing)
3. **Parameters / Headers / Body**:
* You can map the location parameter into the request body or query string, depending on how your weather API expects the input. Parameters can be mapped using mustache templates, as shown in the example: `{{location}}`. This tells the system to dynamically replace the placeholder with the user's actual input when making the API call.
* Example (for JSON body):
```json theme={null}
{
"location": "{{location}}"
}
```
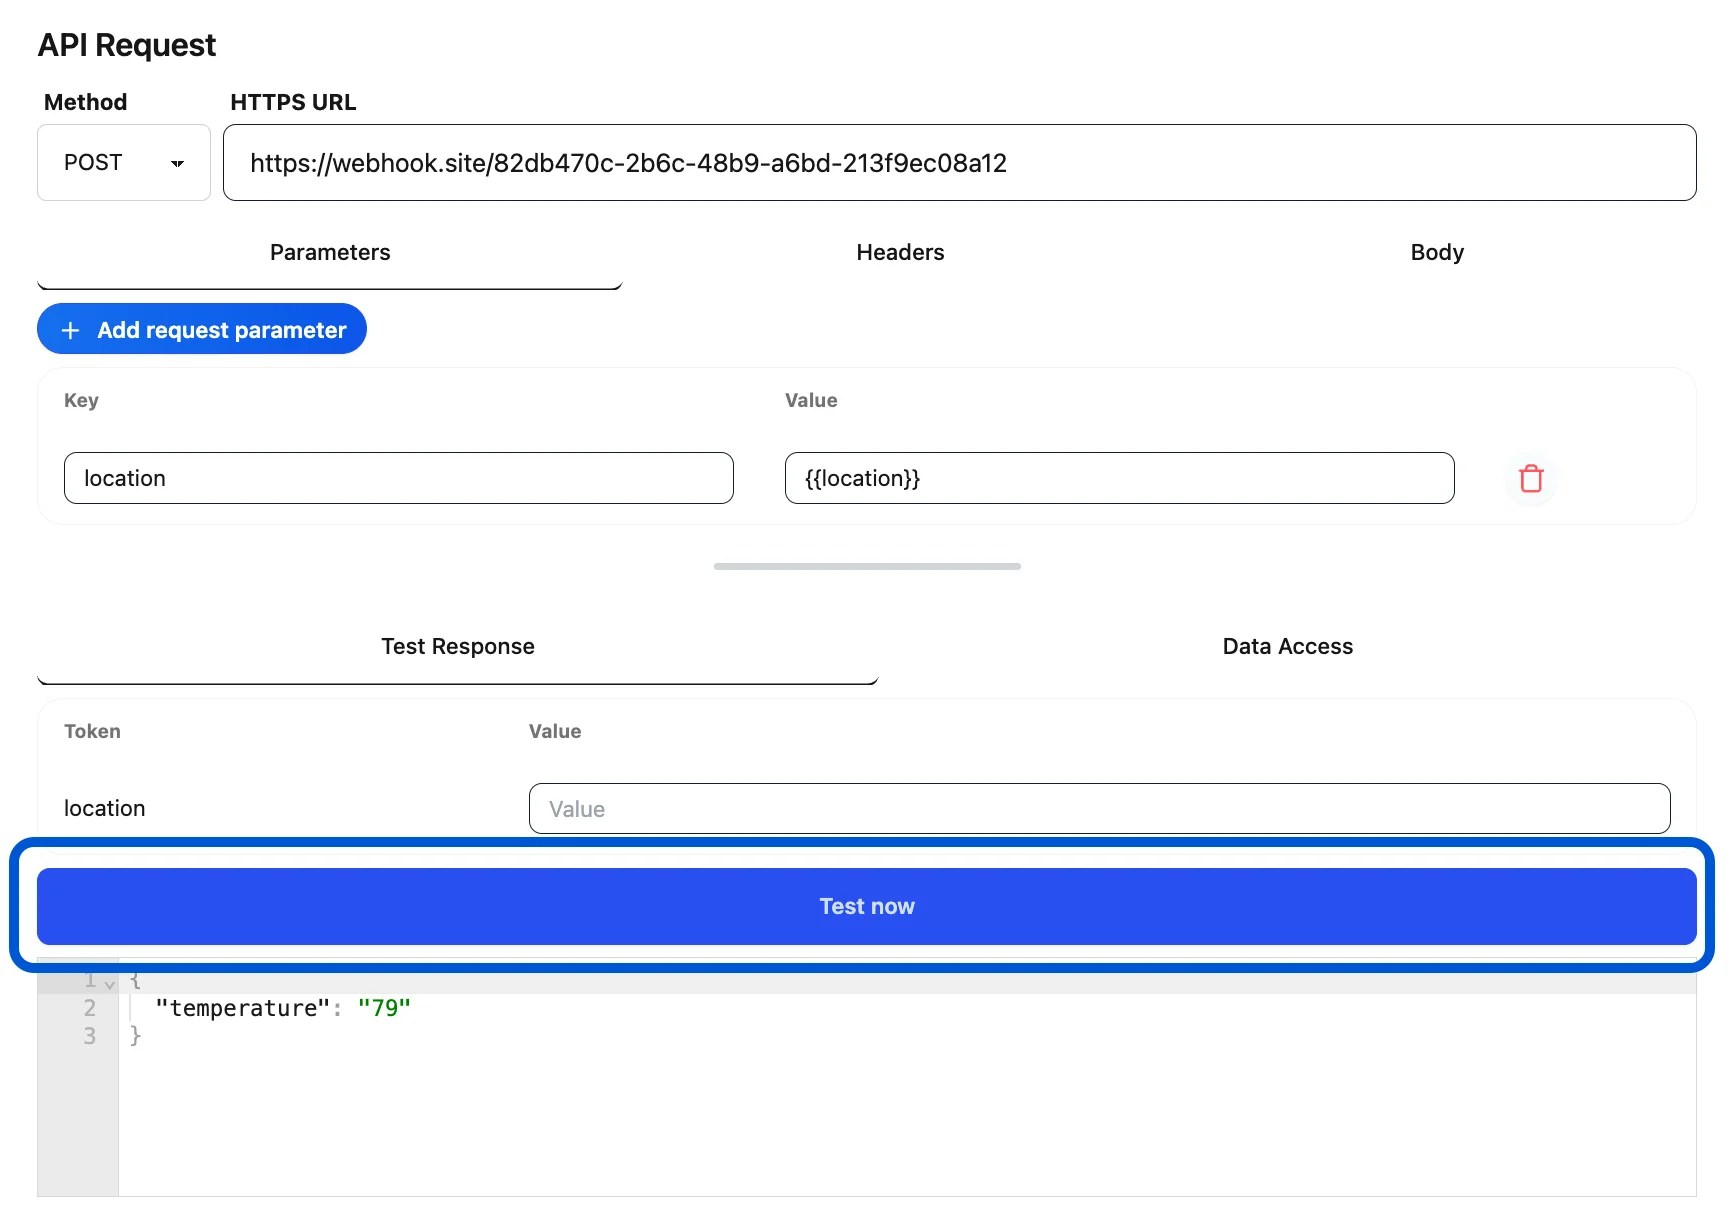
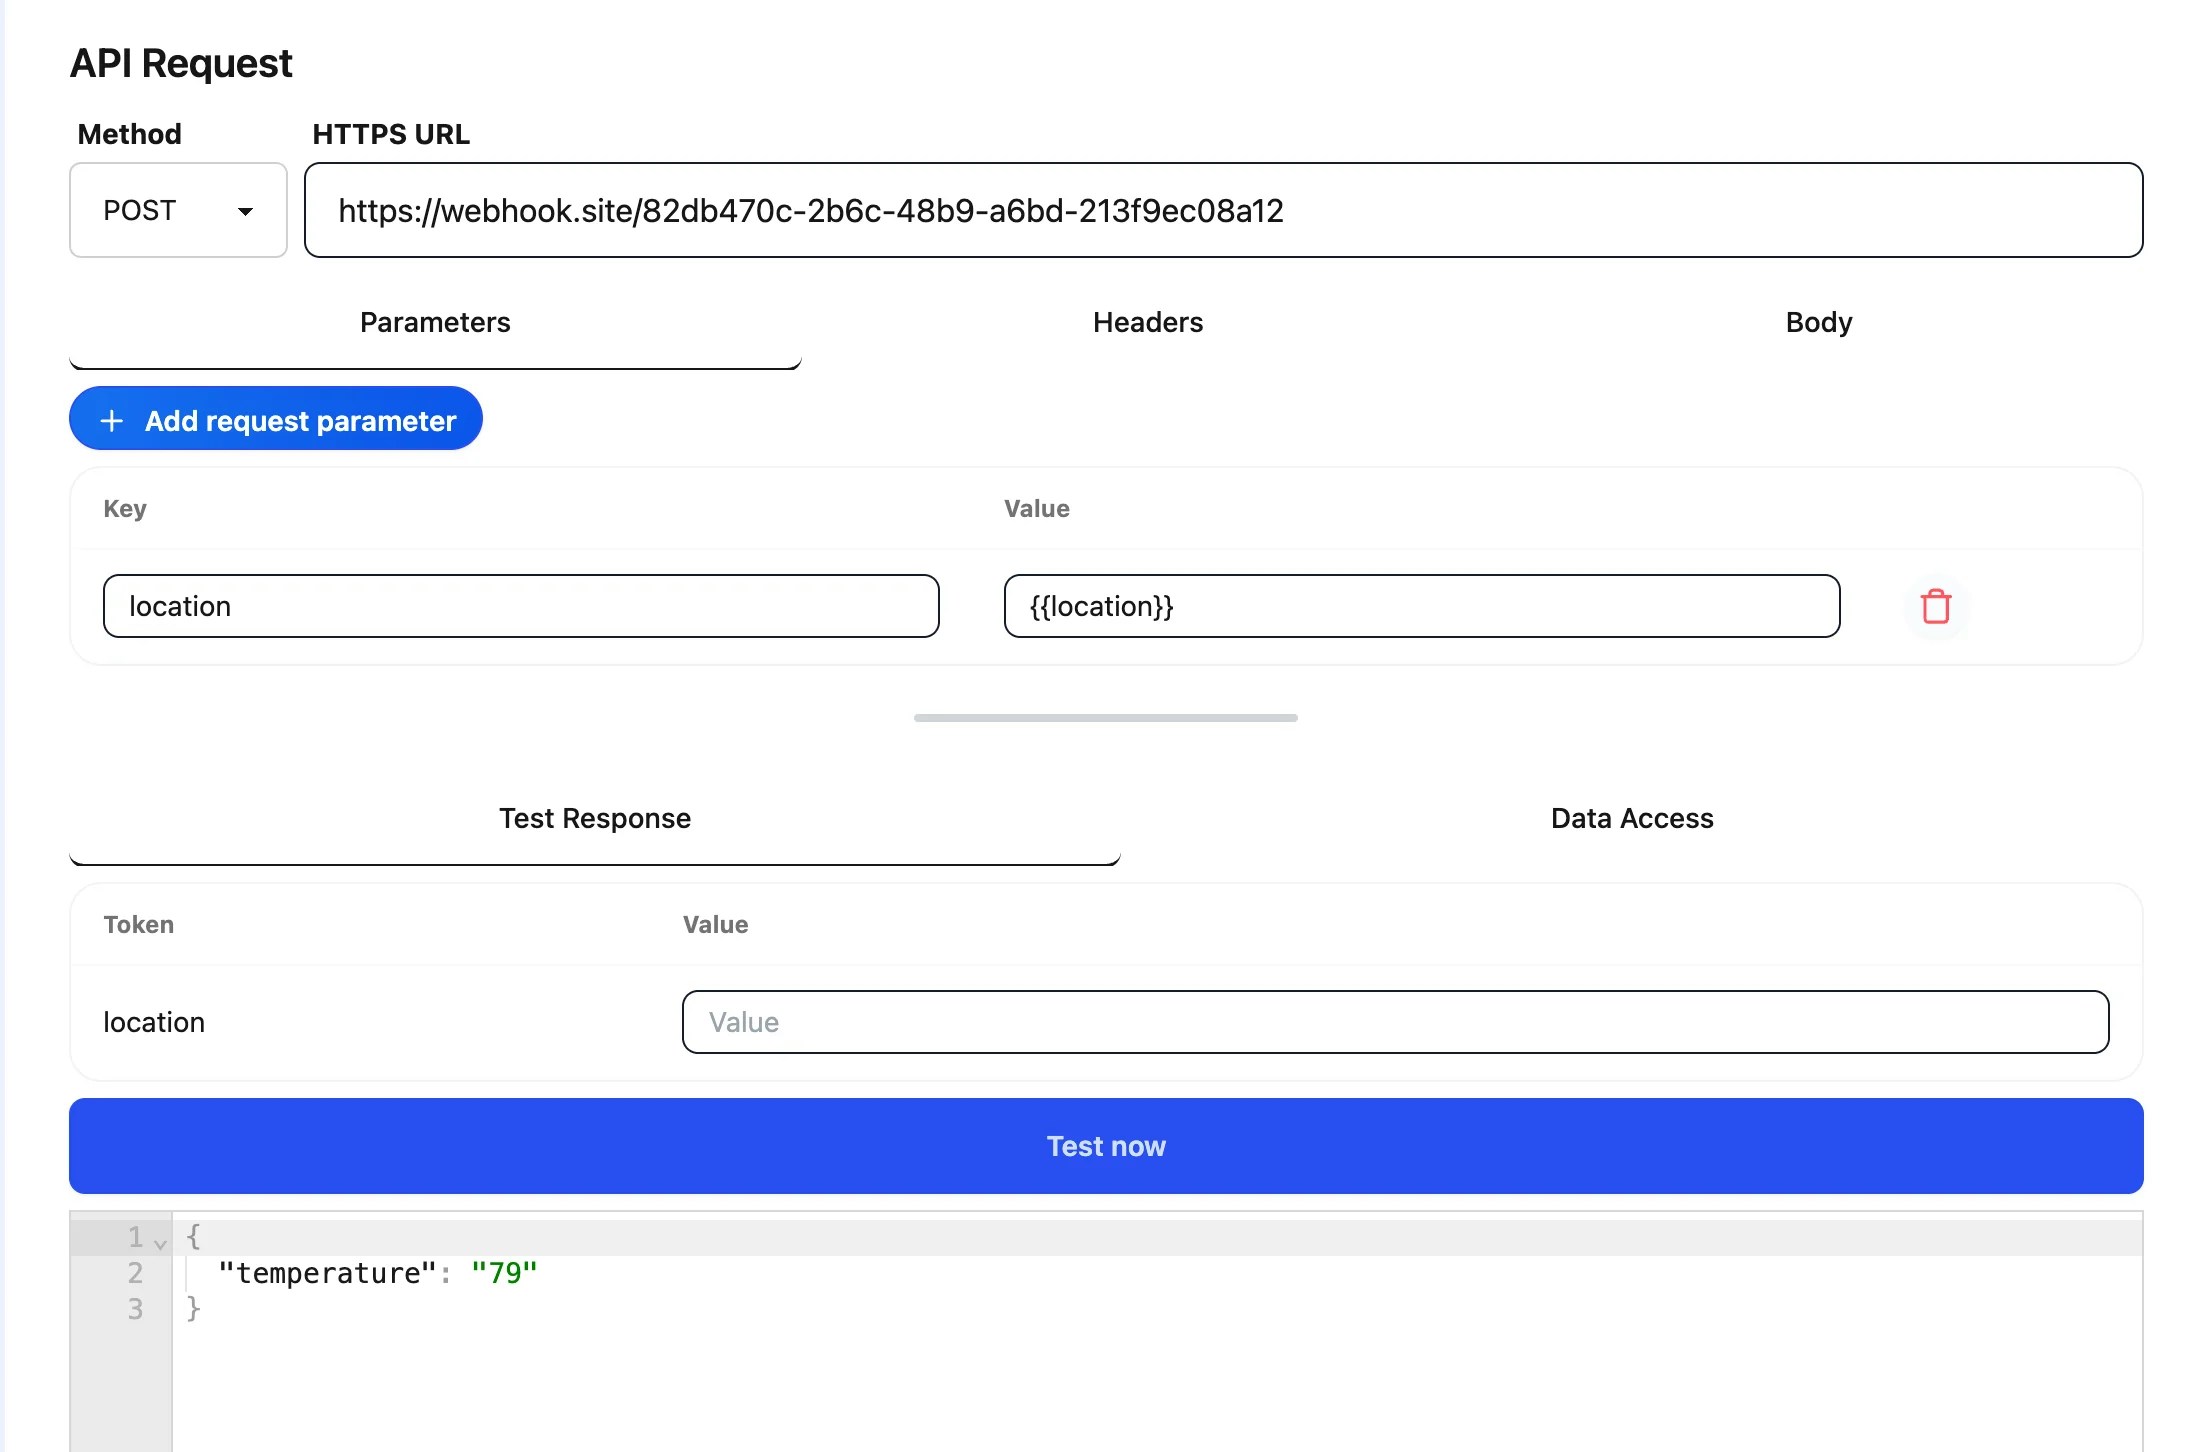 ### Step 5: Test the Request
At the bottom of the configuration screen, you'll see the **Test Response** section.
* Click **Test now** to simulate the request.
* Verify that the API responds with the expected weather data.
* If successful, the response will be available for the AI Agent to format into a reply for the user.
### Step 5: Test the Request
At the bottom of the configuration screen, you'll see the **Test Response** section.
* Click **Test now** to simulate the request.
* Verify that the API responds with the expected weather data.
* If successful, the response will be available for the AI Agent to format into a reply for the user.
 ## Example Workflow
1. User asks: **“What's the weather in Tokyo?”**
2. AI Agent collects the parameter location = Tokyo.
3. Action sends request to the weather API.
4. API responds with real-time weather data.
5. AI Agent replies: **“The weather in Tokyo is 28°C with light rain.”**
With this setup, you can integrate almost any external service — from weather updates to custom business data — making your AI Agent more powerful and useful.
## Example Workflow
1. User asks: **“What's the weather in Tokyo?”**
2. AI Agent collects the parameter location = Tokyo.
3. Action sends request to the weather API.
4. API responds with real-time weather data.
5. AI Agent replies: **“The weather in Tokyo is 28°C with light rain.”**
With this setup, you can integrate almost any external service — from weather updates to custom business data — making your AI Agent more powerful and useful.