> ## Documentation Index
> Fetch the complete documentation index at: https://docs.chatnode.ai/docs/llms.txt
> Use this file to discover all available pages before exploring further.
# SharePoint
> Guide to Integrating SharePoint with ChatNode
### Guide to Integrating SharePoint with ChatNode
Integrating SharePoint with ChatNode allows you to easily upload and train agent data using files stored in your SharePoint sites. Follow this step-by-step guide to set up and manage the integration.
## Steps to Integrate SharePoint with ChatNode:
1. **Access the Integration**:
* Navigate to the **Data** section in your ChatNode dashboard.
* Under **Integrations**, select **SharePoint**.
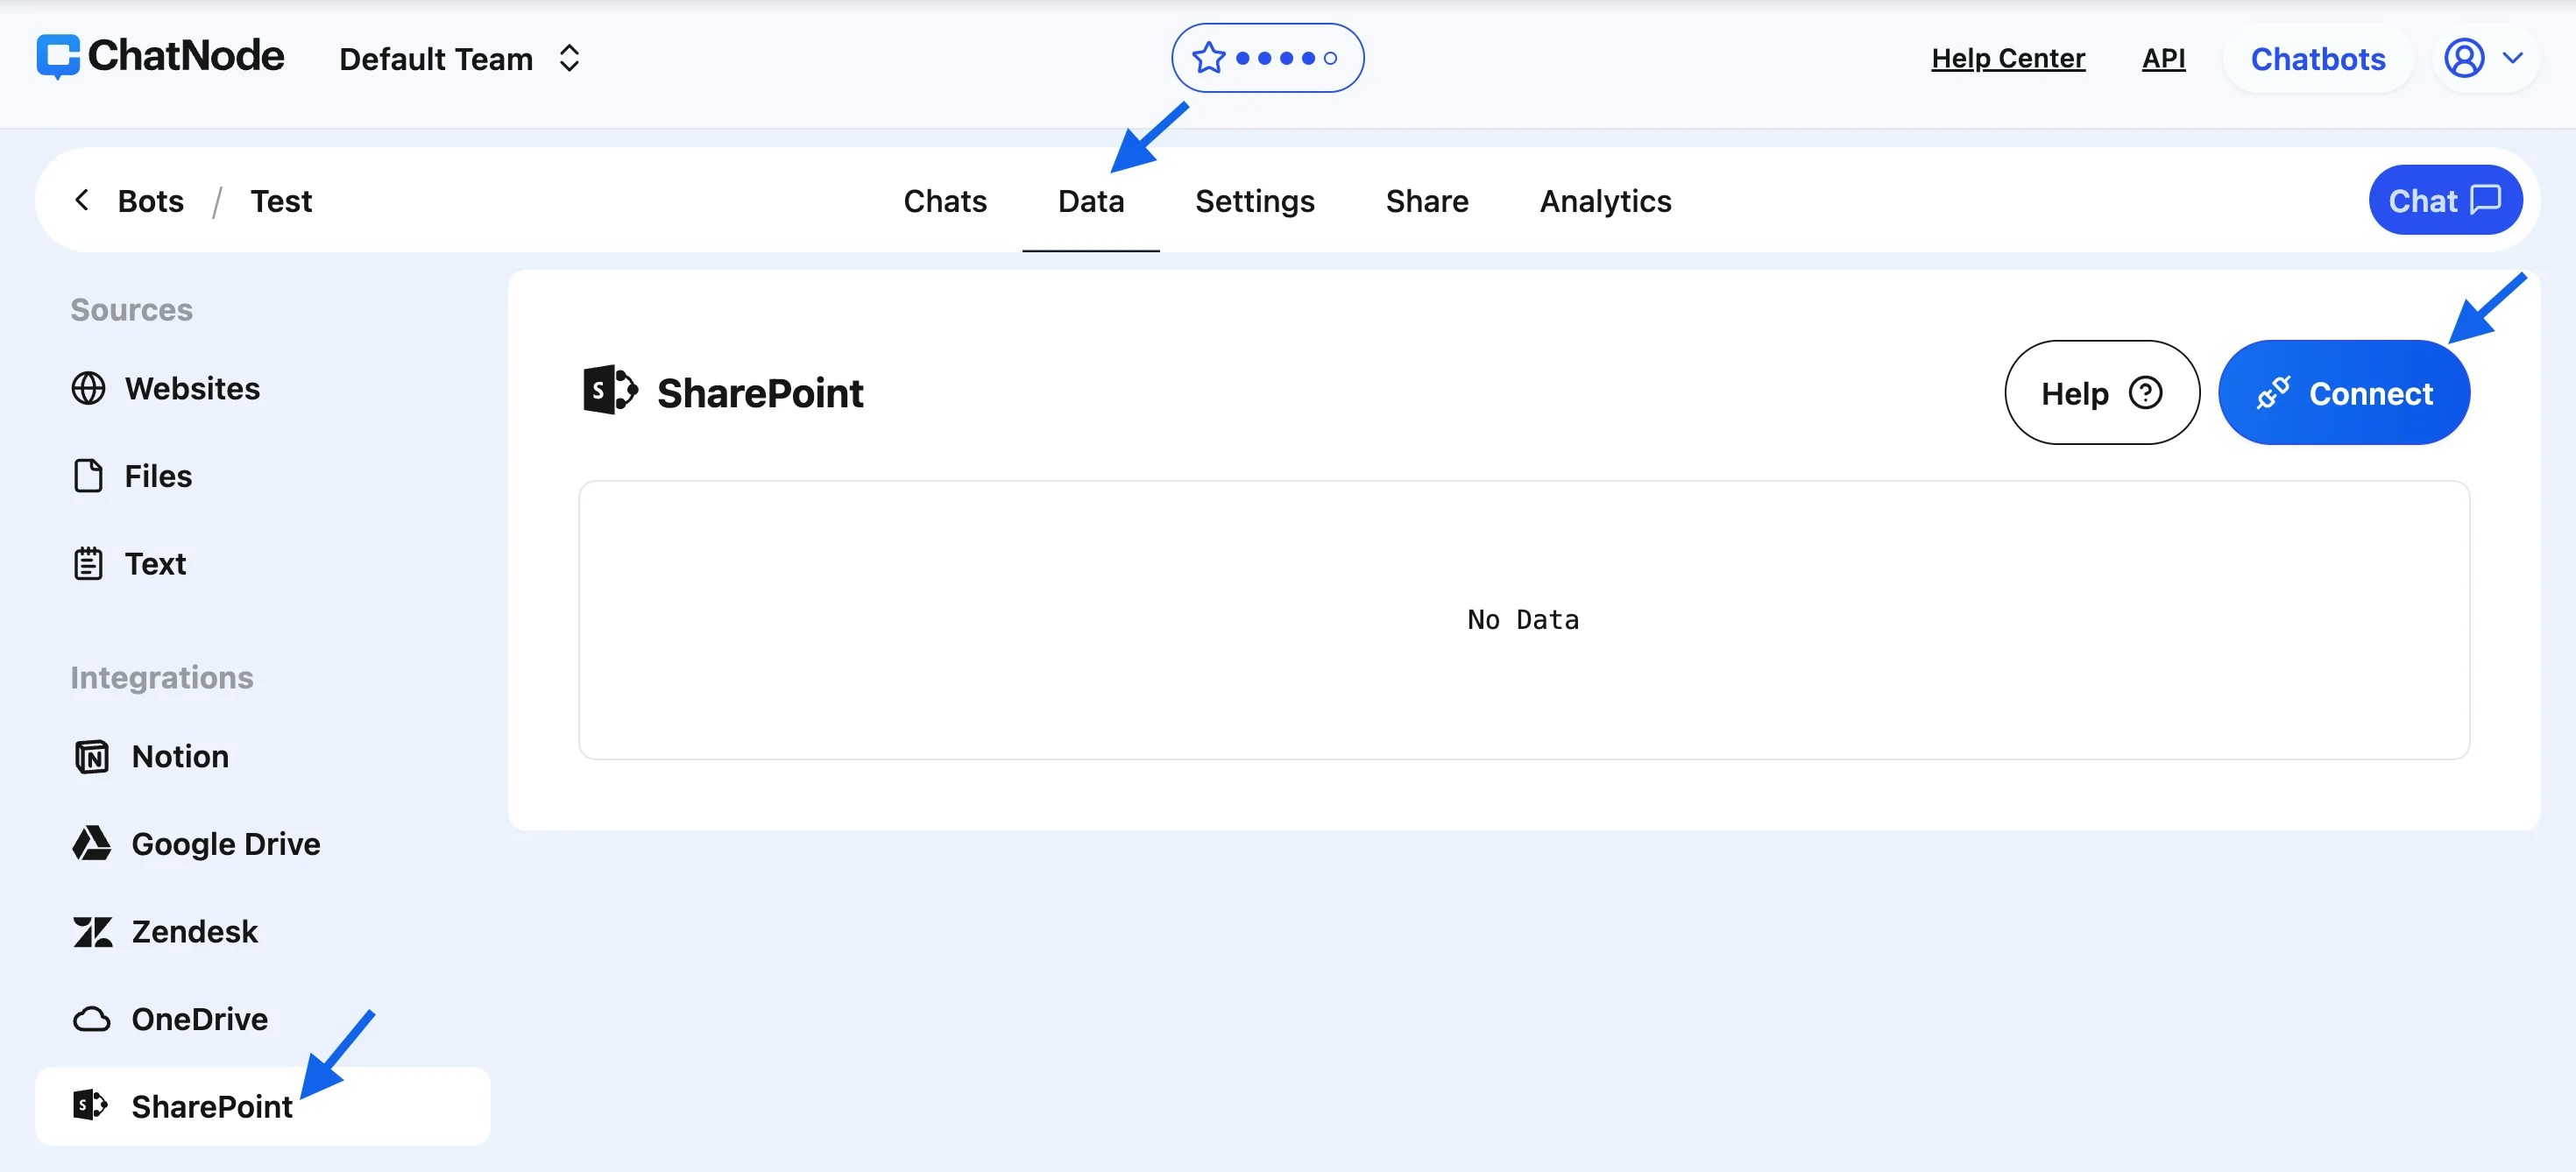 2. **Connect Your SharePoint Account**:
* Click the **Connect** button on the SharePoint panel.
* A pop-up window will appear, prompting you to enter the following details:
* **SharePoint Tenant Name**: The name of your SharePoint tenant (e.g., `yourcompany.sharepoint.com`).
* **SharePoint Site Name**: The specific site name where your files are located.
* After entering the details, click **Connect**.
2. **Connect Your SharePoint Account**:
* Click the **Connect** button on the SharePoint panel.
* A pop-up window will appear, prompting you to enter the following details:
* **SharePoint Tenant Name**: The name of your SharePoint tenant (e.g., `yourcompany.sharepoint.com`).
* **SharePoint Site Name**: The specific site name where your files are located.
* After entering the details, click **Connect**.
 3. **Confirm Connection**:
* Once the connection is successful, a confirmation pop-up will notify you that your SharePoint account is connected to ChatNode.
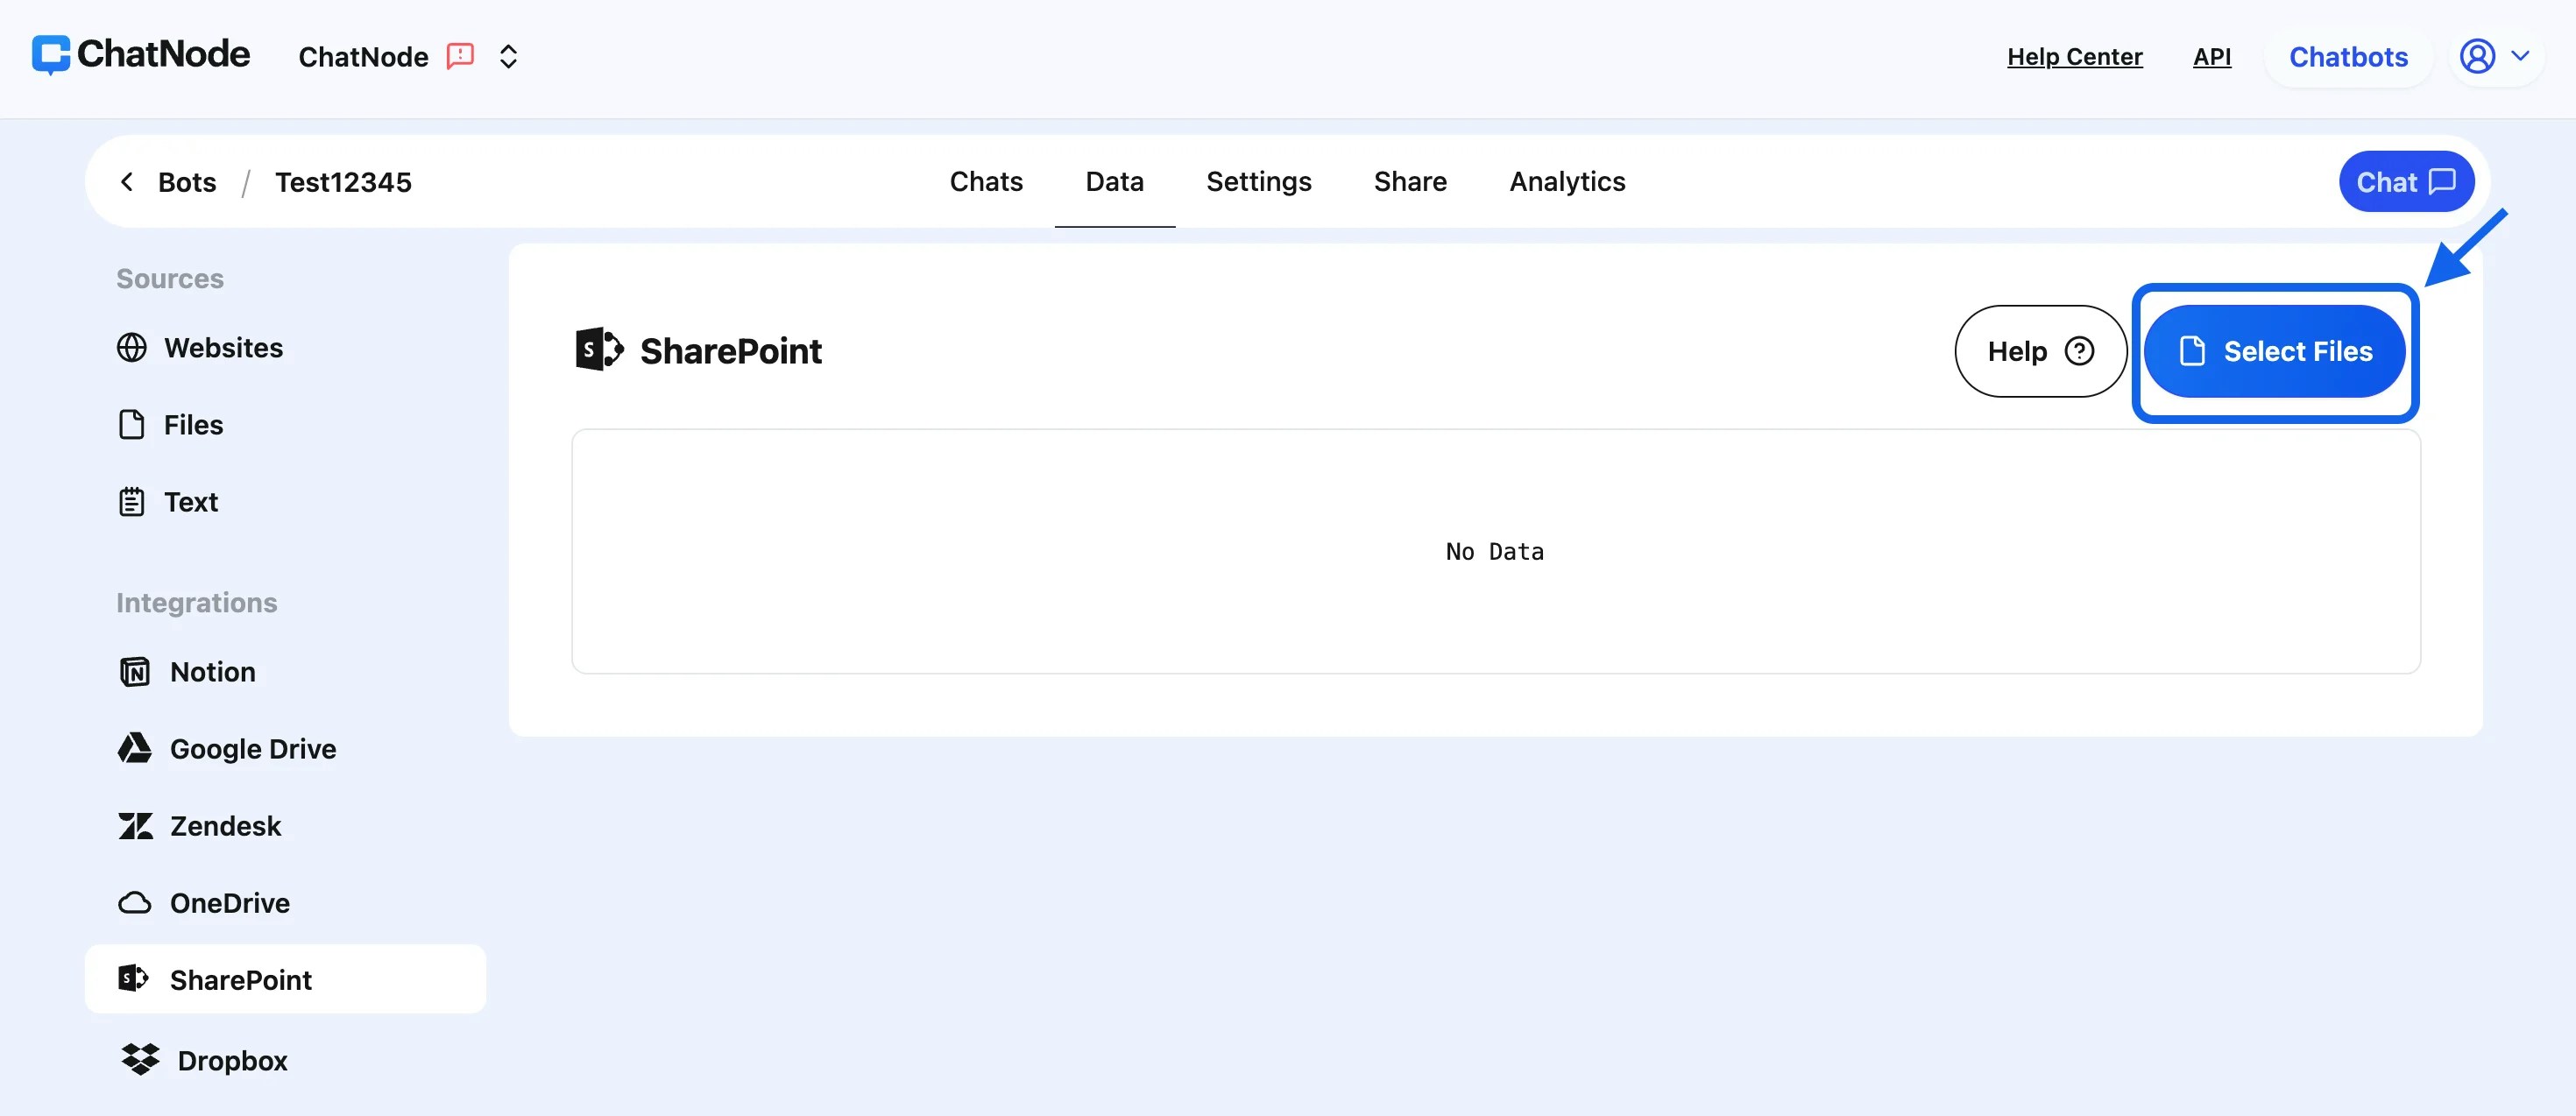
4. **Select Files for Training**:
* Click **Select Files** to browse through the files in your SharePoint site.
* Tick the checkboxes next to the articles or files you want to upload and train.
* After selecting the files, click **Select**.
3. **Confirm Connection**:
* Once the connection is successful, a confirmation pop-up will notify you that your SharePoint account is connected to ChatNode.
4. **Select Files for Training**:
* Click **Select Files** to browse through the files in your SharePoint site.
* Tick the checkboxes next to the articles or files you want to upload and train.
* After selecting the files, click **Select**.
 5. **Automatic Upload and Training**:
* The selected files will be uploaded to ChatNode and automatically trained for agent use.
* You can monitor the training status in the SharePoint panel.
### Managing Your Integrated Files:
1. **Download Files**:
* Each uploaded file includes an option to download its content in `.txt` format, making it easy to review or archive the data.
2. **Retrain with Updated Information**:
* If you've updated a file in SharePoint, tick the checkbox next to the file in ChatNode and click **Retrain**. This ensures your agent reflects the latest data.
3. **Add or Remove Files**:
* **To Include New Files**: Repeat the **Select Files** process to add more data to your agent.
* **To Remove Files**: Tick the checkbox next to the file you want to delete, and click **Delete**. This will remove the file from ChatNode’s training dataset.
#### Benefits of SharePoint Integration:
* **Efficient File Access**: Directly browse and upload files from your SharePoint site to ChatNode.
* **Real-Time Updates**: Keep your agent data current by quickly retraining with updated files.
* **Backup Flexibility**: Download files in `.txt` format for offline use or secure storage.
5. **Automatic Upload and Training**:
* The selected files will be uploaded to ChatNode and automatically trained for agent use.
* You can monitor the training status in the SharePoint panel.
### Managing Your Integrated Files:
1. **Download Files**:
* Each uploaded file includes an option to download its content in `.txt` format, making it easy to review or archive the data.
2. **Retrain with Updated Information**:
* If you've updated a file in SharePoint, tick the checkbox next to the file in ChatNode and click **Retrain**. This ensures your agent reflects the latest data.
3. **Add or Remove Files**:
* **To Include New Files**: Repeat the **Select Files** process to add more data to your agent.
* **To Remove Files**: Tick the checkbox next to the file you want to delete, and click **Delete**. This will remove the file from ChatNode’s training dataset.
#### Benefits of SharePoint Integration:
* **Efficient File Access**: Directly browse and upload files from your SharePoint site to ChatNode.
* **Real-Time Updates**: Keep your agent data current by quickly retraining with updated files.
* **Backup Flexibility**: Download files in `.txt` format for offline use or secure storage.